How to use a RTC With an Arduino UNO R3 to Create an Accurate Clock

Hey all, this tutorial slid through without me making a Forum Post so here is the forum post! ‘How to use a RTC With an Arduino UNO R3 to Create an Accurate Clock’.

This guide starts with a simple ‘Hello World’ equivalent example using only an Arduino Uno R3 and a DFRobot DS1307 RTC Module. Then I kick it up a notch, incorporating an LCD Display, three clicky buttons, and some breadboarding to make a functional, accurate, digital clock.

The Arduino Uno R3 is perfect for a job like this as we can tell it exactly what to do and it will perform that job every time and the instant it turns on. It also has great support for all kinds of maker hardware so you can use it for this project then pull it out, re-flash the code and throw it into a whole different setup doing a completely different task. The DFRobot Gravity RTC clock used here will function for 5 years from when the button battery is inserted providing accurate time for that whole length of time. This has the new version DS1307 RTC module which adopts a high precision crystal oscillator.

This is a great springboard to create your own clock creations with the Arduino Uno using other more exotic display methods (like Nixie Tubes) or improving the code to creating new features (such as multiple clocks running for different locations in the world).

Arduino Clock Neeeewest

Read more

5 Likes

Hello
I have another version of RTC # Gravity: I2C SD2405 RTC Module

I used the same codes - compiling and upload was ok. But running it with the code, the output was
12:05:55.619 → ⸮f⸮`⸮⸮~~Couldn’t find RTC

Any helps/suggestions are greatly appreciated. Thanks.

3 Likes

Hello Tien,

Thanks for posting on the forum :partying_face:

Can you please send through a picture of how you’ve got your RTC breakout connected and which script you were running in particular? Usually this is a good first port of call to establish where the issues are when troubleshooting.

2 Likes

Hi Bryce,
I tried using the rtclib but no success with the Dfrobot I2C SD2405 RTC. Resorted to use Dfrobot coding with success.

I tried using your codes in it to get your output format but got a compile error with below,
Probably with GravityRtc rtc or rtc.begin. What should I do or using? Pardon my limited knowledge here.

Thanks for helping.
Regards,
Tien / Jay

image.png

2 Likes

Hi Tien,

Welcome to the forum!!

Since you’re using a different chip to the one Tim used in the tutorial the code will be slightly different.
Using the code that you originally had working for the SD2405.

There are some changes in the function calls between the two libraries.

RTC_DS1307 rtc; is replaced with GravityRtc rtc;
Make sure that you run rtc.setup(); to start reading the RTC (not in the tutorial code).

There’s some other changes that would have to be made, mostly in the data/time functions - replacing them with the SD2405 equivalent will get you out of trouble.

Let us know how you go!
Liam.

2 Likes

Good day,
I have just started with Arduino and apart from the usual blink, Hello World my first project was to build a clock. I have battled my way through some very difficult to understand clock projects and finally got a clock working. So now I wanted to make my clock better and while searching for different clocks I came across this site. I must tell you that this is the best most comprehensively explained clock project that I have found. The video was excellent, and the explanations are great and what a nice clear easily understood voice. I would like to make some improvements to my basic clock and I am having trouble with the coding. I am 70 years old and I am concerned that I may not live long enough to get this done so I am appealing for some assistance if you can.
I have an Arduino UNO, a DS3231 RTC, and a 16 x 2 LCD with a 12C interface. So what I would like to try and do is is show the time PM/AM on the first row, and then using the scroll function I would like to see day, date year temperature and day in words on the second row. In addition I would like to use a light sensor or an LDR to automatically dim the backlight for night time use in my bedroom. Is any of this possible? and if you can, please help me with this. Many thanks and congratulations on a great clock project and video.
Regards Patrick

2 Likes

If you implement this one step at a time the first step would be to display some of that extra detail on the second line, to confirm that you can retrieve it correctly from the RTC. Then you can upgrade the code to do the scrolling.

Getting the date information follows the same pattern you already have for the time, and the display will also be similar. You could cut and paste that code, replacing hour, minute, second with year, month, day, replacing ‘:’ with ‘/’, and displaying at line 2 instead of 1. Which library are you using, and what code do you have currently for getting and displaying the time? What exactly is the problem you are having modifying that for the date?

2 Likes

Hello Jeff,
Thank you very much for the reply.
It seems that we are in different time zones which is why it has taken me 6 hours to reply.
When I first made this clock the date was on line 1 and the time on line 2 and as it is a clock and not a calendar
I wanted the time on the first line. I managed to change that in the code so it now looks how I wanted it so that
is not my problem. The DS3231 has the ability to display the temperature so I wanted to make use of that feature but
I haven’t managed to get my head around it with the codes. As I am using a 16 x 2 display and there are note enough
characters to display the day in words and the date and the temperature I read about scrolling and I liked that idea but
I have tried to get it to work but have failed miserably. I have copied my working code below for you to look at.
Any assistance and advice is most welcome.
Thank you
Regards Patrick

#include <Wire.h> // for I2C communication
#include <LiquidCrystal_I2C.h> // for LCD
#include <RTClib.h> // for RTC

LiquidCrystal_I2C lcd(0x27, 16, 2); // create LCD with I2C address 0x27, 16 characters per line, 2 lines
RTC_DS3231 rtc; // create rtc for the DS3231 RTC module, address is fixed at 0x68

/*
function to update RTC time using user input
*/
void updateRTC()
{

lcd.clear(); // clear LCD display
lcd.setCursor(0, 0);
lcd.print("Edit Mode...");

// ask user to enter new date and time
const char txt[6][15] = { "year [4-digit]", "month [1~12]", "day [1~31]",
"hours [0~23]", "minutes [0~59]", "seconds [0~59]"};
String str = "";
long newDate[6];

while (Serial.available()) {
Serial.read(); // clear serial buffer
}

for (int i = 0; i < 6; i++) {

Serial.print("Enter ");
Serial.print(txt[i]);
Serial.print(": ");

while (!Serial.available()) {
; // wait for user input
}

str = Serial.readString(); // read user input
newDate[i] = str.toInt(); // convert user input to number and save to array

Serial.println(newDate[i]); // show user input
}

// update RTC
rtc.adjust(DateTime(newDate[0], newDate[1], newDate[2], newDate[3], newDate[4], newDate[5]));
Serial.println("RTC Updated!");
}

/*
function to update LCD text
*/
void updateLCD()
{

/*
create array to convert digit days to words:

0 = Sunday | 4 = Thursday
1 = Monday | 5 = Friday
2 = Tuesday | 6 = Saturday
3 = Wednesday |
*/
const char dayInWords[7][4] = {"SUN", "MON", "TUE", "WED", "THU", "FRI", "SAT"};

/*
create array to convert digit months to words:

0 = [no use] |
1 = January | 6 = June
2 = February | 7 = July
3 = March | 8 = August
4 = April | 9 = September
5 = May | 10 = Octobe

6 = June | 11 = November
7 = July | 12 = December
*/
const char monthInWords[13][4] = {" ", "JAN", "FEB", "MAR", "APR", "MAY", "JUN",
"JUL", "AUG", "SEP", "OCT", "NOV", "DEC"};

// get time and date from RTC and save in variables
DateTime rtcTime = rtc.now();

int ss = rtcTime.second();
int mm = rtcTime.minute();
int hh = rtcTime.twelveHour();
int DD = rtcTime.dayOfTheWeek();
int dd = rtcTime.day();
int MM = rtcTime.month();
int yyyy = rtcTime.year();

// move LCD cursor to upper-left position
lcd.setCursor(0, 1);

// print date in dd-MMM-yyyy format and day of week
if (dd < 10) lcd.print("0"); // add preceeding '0' if number is less than 10
lcd.print(dd);
lcd.print("-");
lcd.print(monthInWords[MM]);
lcd.print("-");
lcd.print(yyyy);

lcd.print(" ");

lcd.print(dayInWords[DD]);

// move LCD cursor to lower-left position
lcd.setCursor(02, 0);

// print time in 12H format
if (hh < 10) lcd.print("0");
lcd.print(hh);
lcd.print(':');

if (mm < 10) lcd.print("0");
lcd.print(mm);
lcd.print(':');

if (ss < 10) lcd.print("0");
lcd.print(ss);

if (rtcTime.isPM()) lcd.print(" PM"); // print AM/PM indication
else lcd.print(" AM");
}

void setup()
{
Serial.begin(9600); // initialize serial

lcd.init(); // initialize lcd
lcd.backlight(); // switch-on lcd backlight

rtc.begin(); // initialize rtc
}

void loop()
{
updateLCD(); // update LCD text

if (Serial.available()) {
char input = Serial.read();
if (input == 'u') updateRTC(); // update RTC time
}
}
1 Like

Just saying that you failed is not actually helpful - what result did you expect to get, and what did you actually get? You say that the code is working, so I assume there are no compilation errors, but an example of what the display should look like is the best way to demonstrate what you want.

It seems from the code that you are trying to print the date in dd-mm-yyyy format, and the code looks OK at a glance. You are using RTCLib, so I can check your code, but that will take a while to set up. However it is difficult to read in that formatting - so in the meantime you can edit your post to put the code into proper format with the preformatted text (</>) option so that it is readable and easy to paste into a test example.

2 Likes

Hi Jeff,

Thanks for the mail.
Please understand that you are dealing with an old moron when it comes to this. In my own speciality I am known as quite smart but here I am way out of my depth.

I do not know how to edit my post and I did not know that you require a preformatted text. Is there somewhere where I can read up on this so that I can get it right. I apologize for making a mess, I will try and learn and get it right in future.

2 Likes

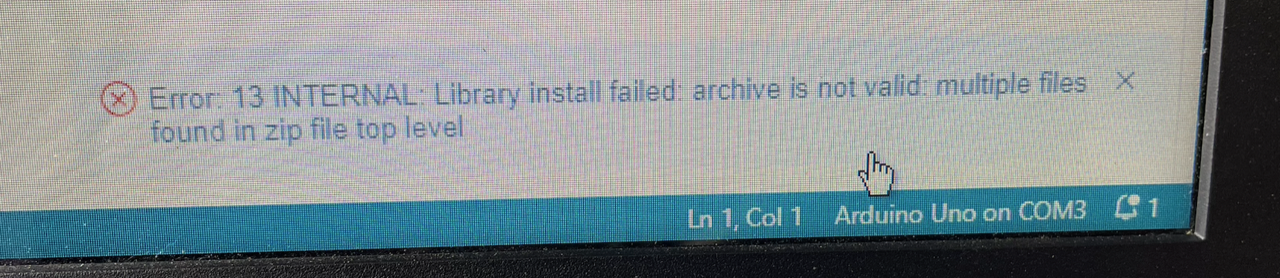
The edit option is the pencil icon at the bottom of your post. To change the code portion of your post select the text and delete it. Then press the ‘</>’ icon in the top bar of the edit window to create a small sample of formatted text, and paste the code over that text.

The problem with code in a message (in addition to the readability issue) is that single and double quotes get changed to opening and closing quotes (which the Arduino IDE does not understand) and odd characters like non-breaking spaces can get added.

The code below implements most of the functions you mention. There is no code to alter the LCD brightness because that will depend on the model of LCD you are using.

The formatting of date and time is somewhat cryptic, but the simplification is justified and making further changes is much simpler. Strings are used to prepare the display rather than updating the LCD piecemeal - space and speed considerations are not significant in this usage. Also, preparing the display text as strings makes debugging with the console particularly easy, and it’s necessary for the scrolling function. The temperature code has been confined to two parts - initialization and getting the value - because your device might be different. Similarly for the ambient light detector, although that code is much simpler. My RTC is different than yours, but this only affects the object instantiation. I have extended the text for month and day to make better use of the scrolling function, and optimised the calculation of the month name.

// Real TIme Clock with LCD Display.
// RTC I2C at 0x68
// EEProm I2C at 0x50
// LCD I2C at 0x27
// DS18B20 at Pin 2
// Photoresistor at pin A0

#include <Wire.h> // for I2C communication
#include <LiquidCrystal_I2C.h> // for LCD
#include <RTClib.h> // for RTC

// DS18B20 single-wire temperature sensor library and object.
  #include <OneWire.h>
  int DS18S20_Pin = 2; //DS18S20 Signal pin on digital 2
  OneWire ds(DS18S20_Pin); 
//
  
LiquidCrystal_I2C lcd(0x27, 16, 2); // create LCD with I2C address 0x27, 16 characters per line, 2 lines
//RTC_DS3231 rtc; // create rtc for the DS3231 RTC module, address is fixed at 0x68
RTC_DS1307 rtc; // create rtc for the DS31307 RTC module, address is fixed at 0x68

/*
  function to update RTC time using user input
*/
void updateRTC()
{
  lcd.clear(); // clear LCD display
  lcd.setCursor(0, 0);
  lcd.print("Edit Mode…");

  // ask user to enter new date and time

  const char txt[6][15] = { "year [4 - digit]", "month [1~12]", "day [1~31]",
                            "hours [0~23]", "minutes [0~59]", "seconds [0~59]"
                          };
  String str = "";
  long newDate[6];

  while (Serial.available()) {
    Serial.read(); // clear serial buffer
  }

  for (int i = 0; i < 6; i++) {

    Serial.print("Enter ");
    Serial.print(txt[i]);
    Serial.print(": ");

    while (!Serial.available()) {
      ; // wait for user input
    }

    str = Serial.readString(); // read user input
    newDate[i] = str.toInt(); // convert user input to number and save to array

    Serial.println(newDate[i]); // show user input
  }

  // update RTC
  rtc.adjust(DateTime(newDate[0], newDate[1], newDate[2], newDate[3], newDate[4], newDate[5]));
  Serial.println("RTC Updated!");
}

//*************
// Get temperature from DS18B20.
// Replace as required for other sensors.
float getTemp() {
  //returns the temperature from one DS18b20 in DEG Celsius
  byte data[12];
  byte addr[8];
  if ( !ds.search(addr)) {
    //no more sensors on chain, reset search
    ds.reset_search();
    return -1000;
  }
  if ( OneWire::crc8( addr, 7) != addr[7]) {
    Serial.println("CRC is not valid!");
    return -1000;
  }
  if ( addr[0] != 0x10 && addr[0] != 0x28) {
    Serial.print("Device is not recognized");
    return -1000;
  }
  ds.reset();
  ds.select(addr);
  ds.write(0x44, 1); // start conversion, with parasite power on at the end
  byte present = ds.reset();
  ds.select(addr);
  ds.write(0xBE); // Read Scratchpad
  for (int i = 0; i < 9; i++) { // we need 9 bytes
    data[i] = ds.read();
  }
  ds.reset_search();
  byte MSB = data[1];
  byte LSB = data[0];
  float tempRead = ((MSB << 8) | LSB); //using two's complement
  float TemperatureSum = tempRead / 16;

  return TemperatureSum;
}
//*********************

/*
  function to update LCD text
*/
void updateLCD()
{
  /*
    create array to convert digit days to words:
    0 = Sunday | 4 = Thursday
    1 = Monday | 5 = Friday
    2 = Tuesday | 6 = Saturday
    3 = Wednesday |
  */
  const char dayInWords[7][6] = {"SUN", "MON", "TUES", "WEDNES", "THURS", "FRI", "SATUR"};

  /*
    create array to convert digit months to words:
    1 = January | 6 = June
    2 = February | 7 = July
    3 = March | 8 = August
    4 = April | 9 = September
    5 = May | 10 = October
    6 = June | 11 = November
    7 = July | 12 = December
  */
  const char monthInWords[12][9] = {"JANUARY", "FEBRUARY", "MARCH", "APRIL", "MAY", "JUNE",
                                    "JULY", "AUGUST", "SEPTEMBER", "OCTOBER", "NOVEMBER", "DECEMBER"
                                   };

  // pointer for LCD scroll start position
  static int pointer = 0;

  // get time and date from RTC and save in variables
  DateTime rtcTime = rtc.now();

  int ss = rtcTime.second();
  int mm = rtcTime.minute();
  int hh = rtcTime.twelveHour();
  int DD = rtcTime.dayOfTheWeek();
  int dd = rtcTime.day();
  int MM = rtcTime.month() - 1;
  int yyyy = rtcTime.year();

  // Get Temperature
  float tc = getTemp();
  // Serial.println(tc);

  // Get Light Value
  int lv = analogRead(A0);

  // move LCD cursor to upper-left position
  lcd.setCursor(0, 0);

  // Create and display time string
  String msg = ((hh < 10) ? "0" : "") + String(hh) + ":"
               + ((mm < 10) ? "0" : "") + String(mm) + ":"
               + ((ss < 10) ? "0" : "") + String(ss) + " "
               + (rtcTime.isPM() ? "PM" : "AM")
               ;
  //Serial.println(msg);
  lcd.print(msg);

  // move LCD cursor to lower-left position
  lcd.setCursor(0, 1);

  // Create and display date string
  msg = String(dayInWords[DD]) + "DAY" + " "
        + String(dd) + " "
        + String(monthInWords[MM]) + " "
        + String(yyyy) + " "
        + String(tc) + char(223) + "C " 
        + "Light = " + ((lv < 800) ? "Lo" : "Hi") + " "
        ;
  // Serial.println(msg);
  unsigned int msgLength = msg.length();
  // lcd scrolling - allow for overflow
  msg += msg.substring(0, 16);
  lcd.print(msg.substring(pointer, pointer + 16));
  pointer = (pointer + 1) % msgLength;
}

void setup()
{
  Serial.begin(9600); // initialize serial

  lcd.init(); // initialize lcd
  lcd.backlight(); // switch-on lcd backlight

  rtc.begin(); // initialize rtc
}

void loop()
{
  updateLCD(); // update LCD text
  delay(200);

  if (Serial.available()) {
    char input = Serial.read();
    if (input == 'u') updateRTC(); // update RTC time
  }
}
2 Likes

Hi Jeff,
Thank you for that information and assistance.
I will give it a go and get back to you.
I don’t expect you to do this for me, just point me in the right direction so that I can learn.
I have some other projects that I want to tackle once I have used this as a learning curve.
So far I have learned to rearrange how the characters are displayed on the display and to put the information where I want it so I am picking it up slowly.

2 Likes

Hey Patrick,

I’ve edited your post so that ones all good! Everyone was a beginner at some point - no reason to beat yourself up, it sounds like you have an amazing project on your hands :slight_smile:

Thanks a ton for jumping in and helping out Jeff! We all really appreciate all of the help you give on the forum.

Liam

1 Like

Personally, my experience is not very good with DS1307.:frowning:

I’m following the instructions on the “How to use a RTC with an Arduino UNO R3 to create an accurate clock”. I’ve added the RTClib and the LiquidCrystal I2C libraries but I’m struggling with the ZIP library. Do I have to download the DFRobot_LCD.h ZIP file from somewhere or should it already be on my computer - if so I can’t find it. Thanks for you help.

1 Like

You can download the required files from the link at the bottom of the tutorial pages under the heading “Downlods and Acknowledgement”. The actual link is
https://core-electronics.com.au/media/kbase/466/Code_and_Zip_Library_Needed.zip.

If you unzip that file you will have two folders - the DFRobot_LCD library folder, which you can import into the IDE using the instructions in the tutorial, and you will have the folder for the clock program.

1 Like

Jeff

Thanks for your help but I’m still struggling with this. I think there must be something fundamentally I misunderstand about this process. Please bear with me.

I trying to do this on a MacBook. After I click on the link in your email (and similarly on the link on the tutorial page), I then go, in the Arduino program, to Sketch/Include Library/Add .ZIP library and I get this in my Downloads:

But I can’t find a .ZIP file there to add (I guess my MacBook has already unzipped the file?).

If I repeat the process on a Windows pc, the .ZIP file is there in my Downloads but when I select it in the Arduino program I get the message the message below at the bottom right hand corner of the screen:

I hope you can help me. Thanks, David.

1 Like

You have to unzip the file you downloaded. It should be “Code_and_Zip_Library_Needed.zip” so perhaps the PC is hiding the filename extension. I think that the message from the Arduino IDE is telling you that it really is a zip file, even though the extension is not showing.

When you unzip it you will get two folders - ‘Clock-Code-Best’ which is the sketch folder, and ‘DFRobot_LCD-master’ which is the library folder. The library folder can then be installed as per the instructions here under "Manual Installation’. Skip ahead in that process to the part where you have already extracted the library from the ZIP and you have the ‘…-master’ folder.

The tutorial recommendation is to install the library as a zip file, but it appears that this is out of date - the contents of the ZIP file that you download is not what the IDE expects, so the installation process is different. You could perhaps zip that library folder then import it as a ZIP! Or, delete the ‘Clock-Code-Best’ out of the zip file after you extract it, and try importing the ZIP file again - I think that would work. But the reference above for manually installing a ‘Master’ should work OK.

1 Like

Jeff, all working now. Thanks very much for your help. David.

| Jeff105671
29 March |

  • | - |

You have to unzip the file you downloaded. It should be “Code_and_Zip_Library_Needed.zip” so perhaps the PC is hiding the filename extension. I think that the message from the Arduino IDE is telling you that it really is a zip file, even though the extension is not showing.

When you unzip it you will get two folders - ‘Clock-Code-Best’ which is the sketch folder, and ‘DFRobot_LCD-master’ which is the library folder. The library folder can then be installed as per the instructions here under "Manual Installation’. Skip ahead in that process to the part where you have already extracted the library from the ZIP and you have the ‘…-master’ folder.

The tutorial recommendation is to install the library as a zip file, but it appears that this is out of date - the contents of the ZIP file that you download is not what the IDE expects, so the installation process is different. You could perhaps zip that library folder then import it as a ZIP! Or, delete the ‘Clock-Code-Best’ out of the zip file after you extract it, and try importing the ZIP file again - I think that would work. But the reference above for manually installing a ‘Master’ should work OK.

Hi, for the jumper wires, it says I have to get male to male but the picture shows female to female, so what wires should I use? F,F or M,M or F,M?