I have a DFRobot Heart Rate Sensor. I have a working code but am having trouble making the sensor work. Any suggestions?
5 Likes
Hello Ella,
Welcome to the forum! What’s the microcontroller and interface that you’re using with the Heart Rate Sensor? Could you please also put up some photos of the sensor and its connections to your project, that’ll be very helpful in troubleshooting. Thanks
Bryce
Core Electronics | Support
2 Likes
Hi Ella,
I think I answered a call about this one. I believe you’re using a PPG Sensor from DF Robot: https://core-electronics.com.au/gravity-heart-rate-monitor-sensor-for-arduino.html ?
I believe he said the on-board LED would blink a few times, detecting a pulse but then stop?
As Bryce said, if you could share the code you’re using and give us some photos of how you’ve got it all wired up and being used that would be fantastic! The more relevant info you can provide us, the better.
Regards,
Oliver
Support | Core Electronics
2 Likes
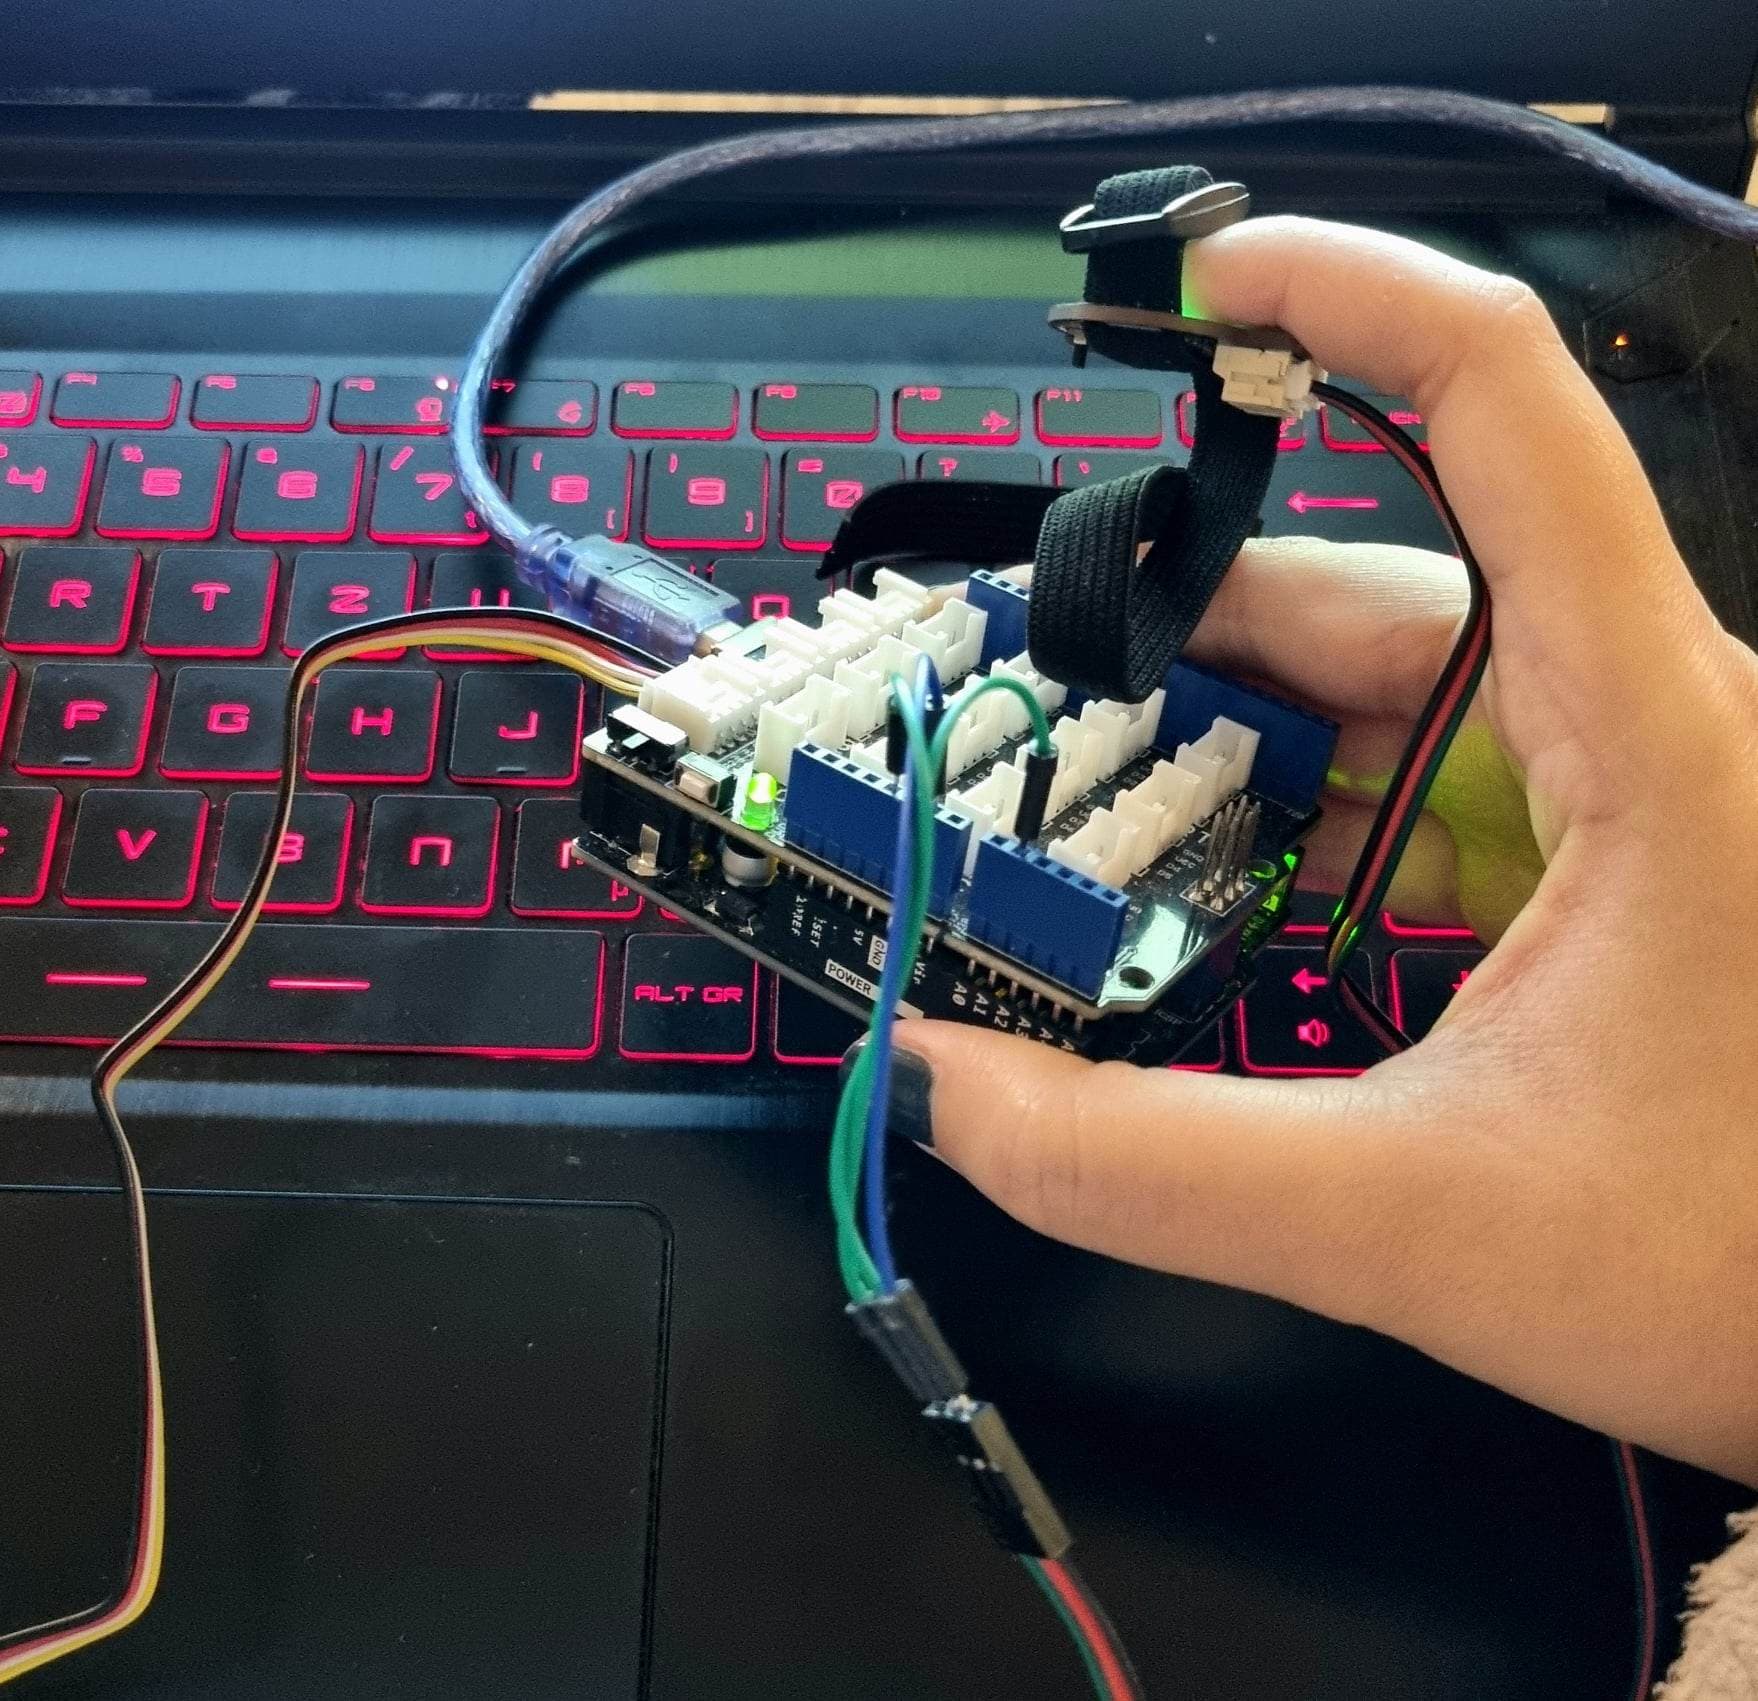
Hello,
I am using an arduino uno with a shield;

Here is the code I have been using;
#define heartratePin A1
#include “DFRobot_Heartrate.h”
DFRobot_Heartrate heartrate(DIGITAL_MODE);
void setup() {
Serial.begin(115200);
}
void loop() {
uint8_t rateValue;
heartrate.getValue(heartratePin);
rateValue = heartrate.getRate();
if(rateValue) {
Serial.println(rateValue);
}
delay(20);
}
Thanks!
1 Like
Hi Ella,
In the photo it looks like you’ve left the switch on the sensor set to A for Analogue mode. Can you try switching it to D and testing again?
Regards,
Oliver
Support | Core Electronics
1 Like
Hey Ella,
Here’s another test you can perform, if you can upload and run this very simple script that I’ve written below so we can check to see whether there’s a proper output from the sensor that should assist in troubleshooting (Note: You can use CTRL+SHIFT+L to access the serial plotter to graph this output).
#define READ_PIN A1

void setup() {
  Serial.begin(9600);
  pinMode(READ_PIN, INPUT);
}

void loop() {
  Serial.println(analogRead(READ_PIN));
  delay(20);
}
Bryce
Core Electronics | Support
2 Likes
Hey Bryce,
I have tried that code but it appears to be returning similar results as seen in the photo.
Thanks Ella

1 Like
Hey Oliver,
When in Digital mode it returns special characters rather than numbers (eg ??YK).
Thanks Ella
1 Like
Ella, looks like your code is for digital mode at a baud rate of 115200. Have you set the serial monitor to this baud rate or did you leave it at 9600 when testing in digital mode?
With Bryce’s code, you’ll need to make sure you set the switch on the sensor back to analogue mode. It looks like you might have left it in digital mode judging by that data trace jumping between 0v and 5v (1023).
1 Like
Hi Oliver,
When set to 9600 it says “Waiting for valid data!” in both analogue and digital mode. It continues to return special characters in digital mode, is this an error further down in my code?
I have switched it back to analogue mode and tested Bryce’s code and it appears to be working now!

Thanks Ella
4 Likes
Hi Ella,
Glad to see it’s at least partially working! I’ve looked at the DFRobot_Heartrate library to get a handle on how it’s determining heartbeats and when it shows .“Wait for valid data !”
Expectedly, it is relatively simplistic. It determines that a heartbeat has started when the voltage reading increases 4x in a row, and determines a heartbeat has stopped after the reading decreases 4x in a row.
In analogue mode it needs the 4th and 8th beats t measures to be less than 150 bpm different, and it needs to measure at least 10 heartbeats before it will show a reading.
In digital mode,it needs the 4th and 8th beats it measures to be less than 120bpm different, and it needs to measure at least 10 heartbeats before it will show a reading.
All this just means that when using the sample code you need to sit very still for at least 20 seconds before you can expect to get a reading when using the example code from the DFRobot wiki.
The heart rate it returns is a moving average of 5 heartbeats, (your second last and 7th last heart beats).
I haven’t followed the algorithm super carefully, but this appears to be how it works. I hope this helps!
Regards,
Oliver
Support | Core Electronics
5 Likes
Hi Oliver,
I will do a few test using that theory and see if anything pays off!
Thanks Ella
4 Likes
I have the same sensor and am using the same code with digtal mode. I have waited without moving for more than a minute and I am still getting “Wait for valid data !”. I have been trying to figure out why it is not working and have tried a simple code to print the readings directly and the graph looks so noisy.
Even with a little more complex codes to visualize heart beats it is really noisy and not accurate, tried to play with threshold and delay values but still not good.
1 Like
Somebody wrote about the same problem one year ago here: Gravity: Heart Rate Monitor Sensor For Arduino - DFRobot but I cannot see any answer yet! I think dfrobot should give a troubleshooting guideline. Pulse sensor is more user-friendly than this one.
Hi Marah,
Running Bryce’s code above, with the sensor in analog mode,
What do you see on the serial plotter in the Arduino IDE?
Can you send through a photo of your sensor hooked up and in use?
That’ll give us the ammo we need to help out here ![]()
-James
1 Like

Hello ![]()
I am still trying to get the sesnor working properly. Is there any thing I can do to fix it?
Troubleshooting a DFRobot Heart Rate Sensor can be tricky, but with a bit of patience and care, you should be able to identify the issue and get it working properly. Here are some suggestions for troubleshooting your sensor:
- Check the connections: Make sure that the sensor is properly connected to your microcontroller. Check the wiring and make sure that the pins are in the correct order.
- Check the power supply: Make sure that your microcontroller is providing the correct amount of power to the sensor. The DFRobot Heart Rate Sensor requires a power supply of 3.3V to 6V.
- Check the code: Make sure that your code is correct and that you are using the correct library. The DFRobot Heart Rate Sensor has two modes: analog and digital. Make sure that your code is set to the correct mode.
- Check the sensor itself: Try using a different DFRobot Heart Rate Sensor to see if the problem is with the sensor itself.
- Check the environment: Make sure that you are not using the sensor in a noisy environment. The DFRobot Heart Rate Sensor is sensitive to noise and can give inaccurate readings in noisy environments.
- Check the user’s finger: Make sure that the user’s finger is properly placed on the sensor. The sensor should be placed on the fingertip, with the fingertip firmly pressed against the sensor.
If you have checked all of these things and you are still having trouble getting the sensor to work, you can try contacting DFRobot support for further assistance.
1 Like
Hi John,
You are right, heart rate sensors can be tricky. Thanks for the great trouble shooting tips!
Cheers,
Sophia