Bought one of these Solar Skill Badges some time ago (might have been on sale) something to play with at a later date.
What could I make with this that did something and could be still used as a badge; was the question.
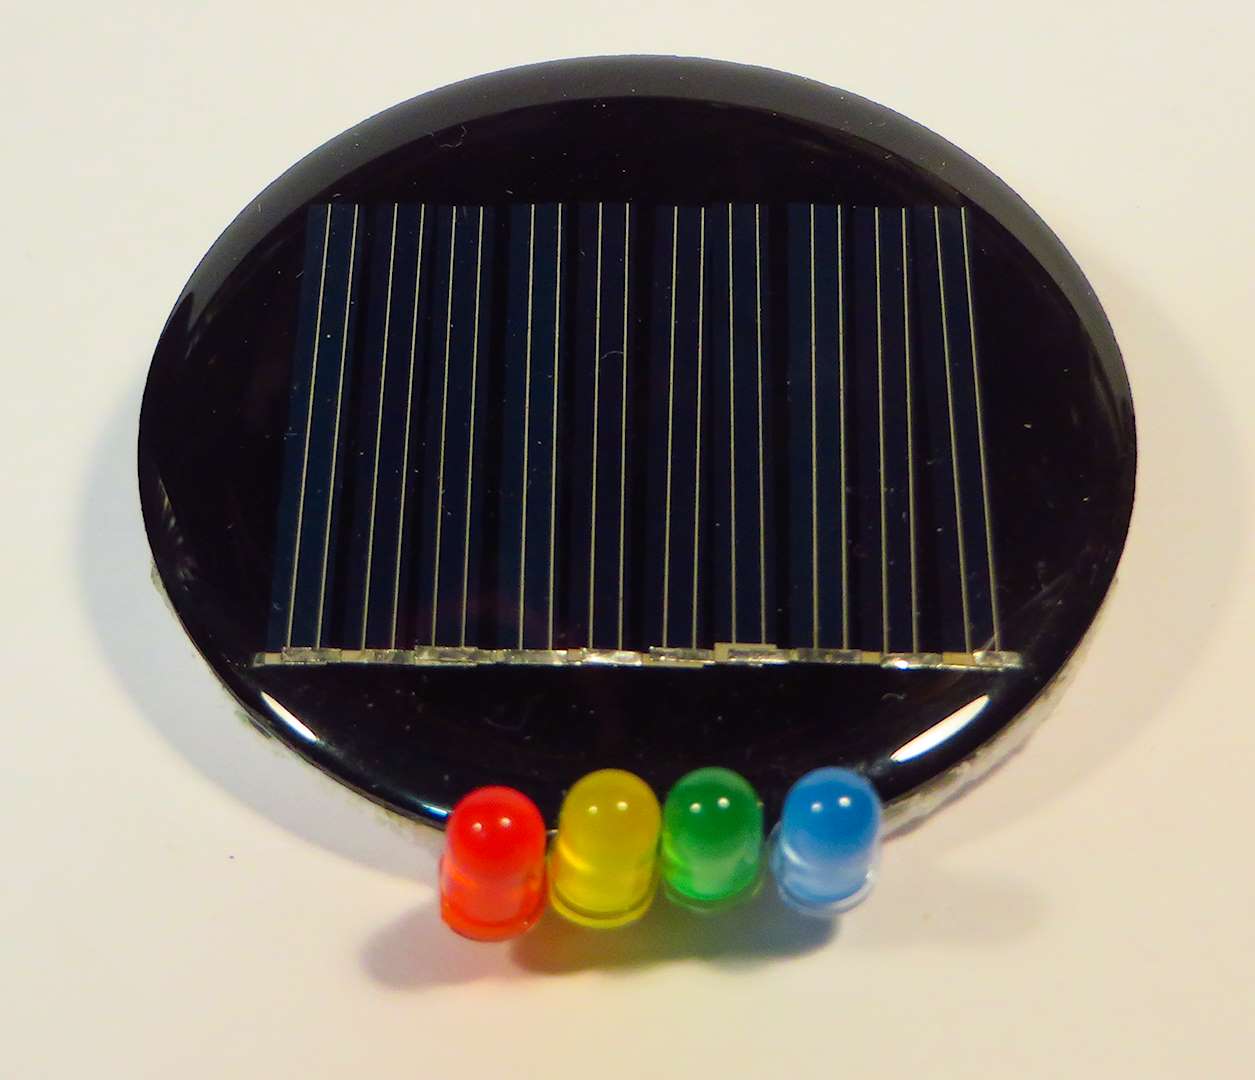
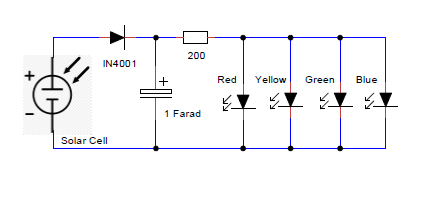
Ended up with something simple that amused the grandkids for a while. Solar Cell charges a 1 Farad capacitor which then discharges through 4 flashing LEDs. Takes a minute or 2 in the sun to charge to about 4.5 volts and then flashes all LEDs at reasonable brightness for about 10 to 15 minutes in the shade. The Red one stays on the longest and can tale over 30 minutes to stop flashing. The LEDs flash at 2Hz but there are slight variations that make the flashing look good. The kids found it amusing and they have an idea of what a solar cell can do. Free energy from the sun.
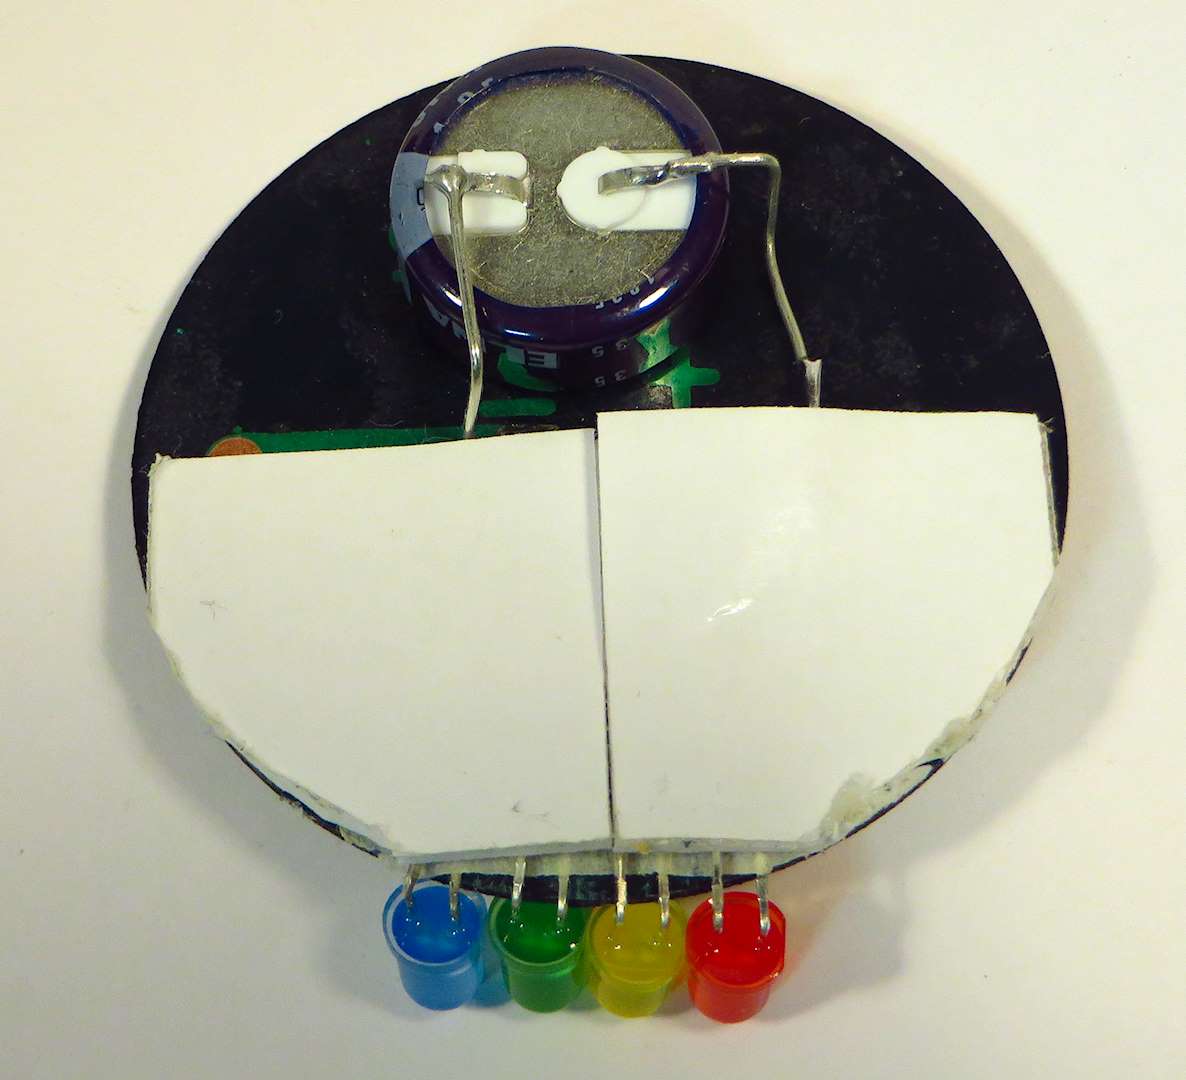
Project was put together pretty fast, soldering not the best. The double sided tape was to protect the circuit and little fingers. Would stick the lapel pin on the capacitor so it could be worn.
Anyway, thought I would share here.
Next project to amuse the little ones is the Glowbit Rainbow. Hoping the older one may pick up something with programming if. He states what he would like to see and we then program it and he sees it happening. .Parts currently on order.
Love it! Sometimes simple little circuits can be the most fun. If you are looking for a device to learn coding on, check out the new Raspberry Pi Pico board:Raspberry Pi Pico Australia This would be perfect for learning how to program - as an added bonus we also have a tutorial on how to work with the glowbit.
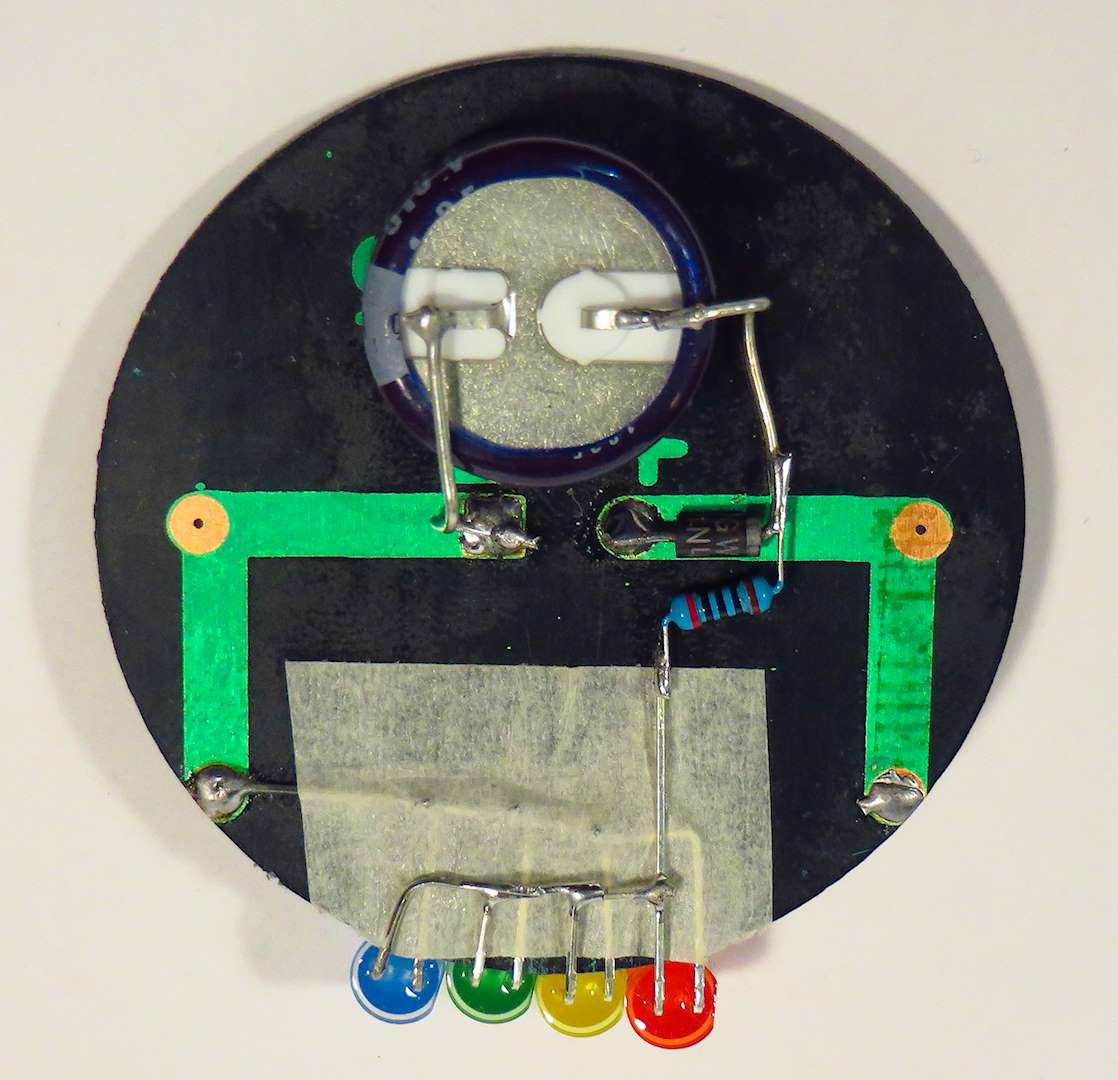
Diode drops the 6V open circuit of Solar Cell to around 5.5V maximum of the capacitor, in theory.
In practice the cap only reaches 4.5V anyway. Secondary function is to limit current to one direction.
Blue LED is brightest and stops flashing first.
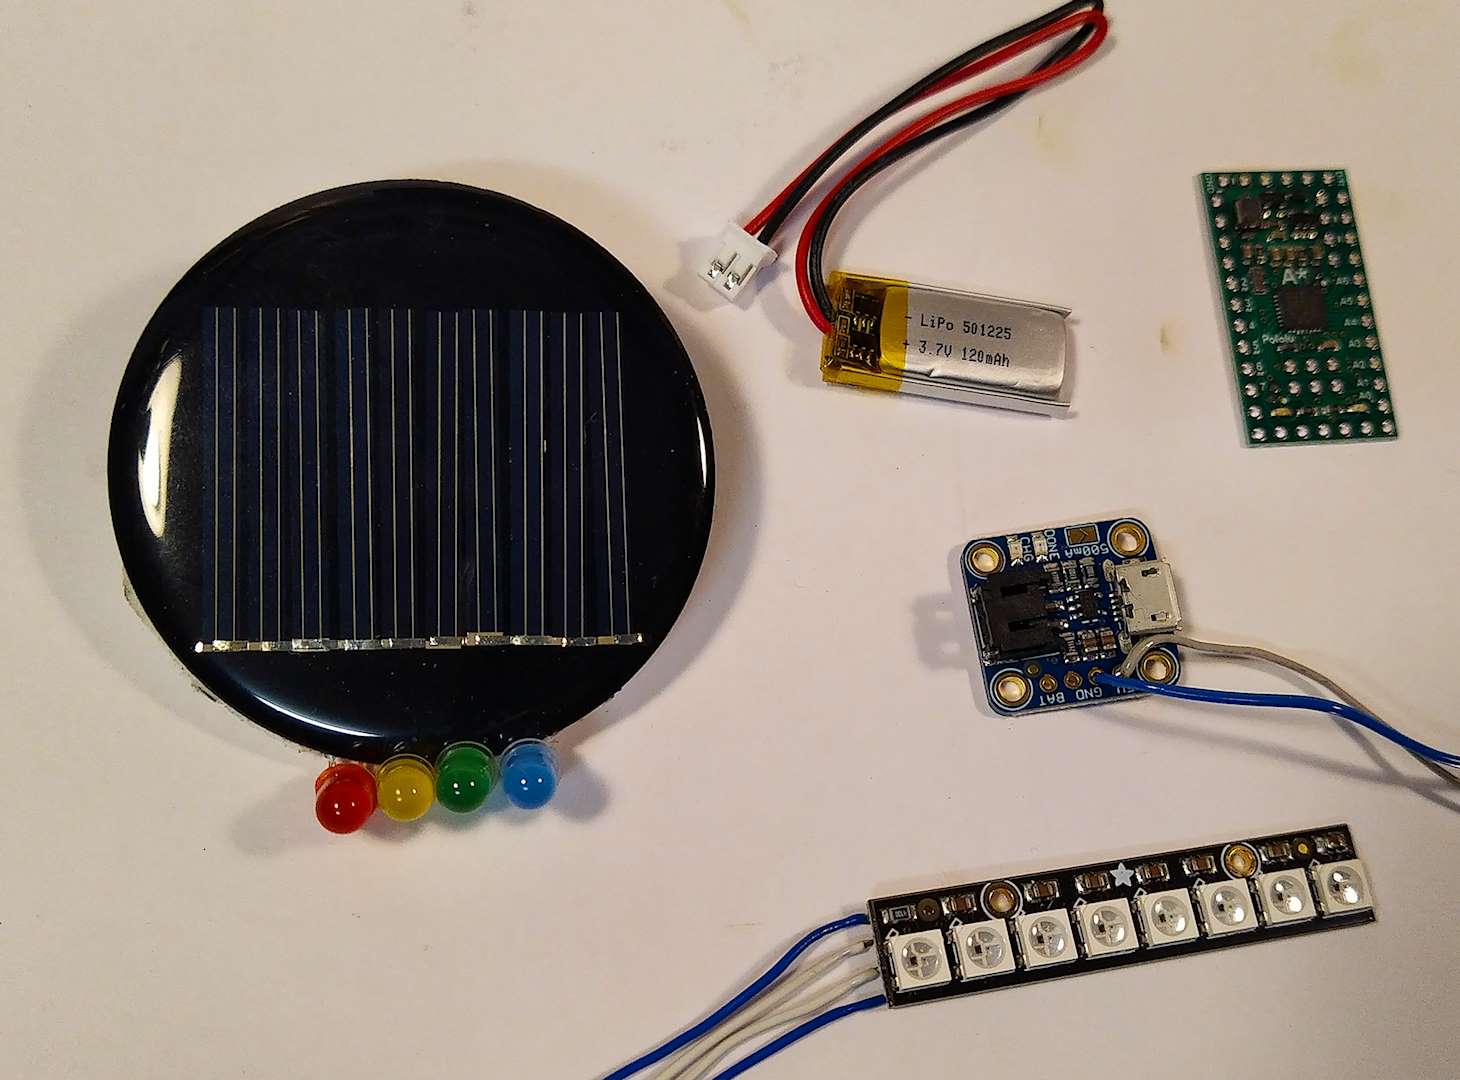
I considered a 120mAH Lipo, a charge board, Pololu ATMega328P board and strip of programmable LEDs. All would fit on the back, but to charge the Lipo would mean a long time in the sun.
Have a Pi Pico, 2 Glowbit Rainbows and BBC Microbit on order. Programming is not new to me. A lot of what I do is to amuse the Grandkids, all good. Cheers
footnote:::
leds come in different brightness/intensity /beam.size/shape etc.etc…
the blue led your using is different to the others.it looks high intensity /spread…
you can get pencil and spread beam…and current drain differs…
there are so many variants on the market when it comes to leds these days…
tip::swap out the red led.
::: try and get some black nail polish and apply to the body of the leds…an old trick but effective…it stops spread of light between the leds when there close together…
This is a really interesting effect! Here’s a little simulation I made up. Not very scientific - just played with the values till I got the result I was looking for, but the principles will be the same.
The Blue LED has a lower forward voltage then the others. As the voltage from the panel climbs it charges the cap until it exceeds the forward voltage of the LED. As the current climbs through the blue LED, the slight resistance and inductance of the wires causes enough of a voltage drop to exceed the other LED’s forward voltages - these in turn experience a current surge which provides enough current to allow the neighbouring one to turn on.
But the panel can’t keep - the power draw is too great. The panel voltage drops and the cap discharges. All for the cycle to repeat again.
Don’t know if this is what you want. The list below I have in my parts box and was what I planned to use. I did not proceed seeing the simple design as doing what i wanted. It was just early planning.
The Neo Pixel strip would have been a problem as it needs 5V generally. A Pololu step up power supply board would have fixed it (these things are tiny for what they output). In this design the solar panel would not have contributed much. It would take hours in full sun to charge the LiPo, but the ability to charge via a USB port would have made it redundant.
This was my plan. Parts seemed to fit ok. Might have changed location of each. No idea how to attach or to ensure no shorts. Probably use enamelled wire to connect. Has worked successfully on other projects, easy to hide and wire if very thin.
Yet to play with the A-Star Micro, like the small size and the possibilities. Being able to connect direct to a LiPo is very good. The Neo Pixels are awesome with what you can program them to do.
But for now the Solar Button is exactly as I want it to be.
Thanks for all the comments, everyone.
Cheers
Jim
The 120mAh LiPo is from Core Electronics and the pic shows it as it came in the packaging. Link in previous post. It is tiny. These batteries have on board chips to manage the charge and discharge cycles. They are excellent for use in low power projects and for when you want something to fit in a small space.
The battery shown works very well and was used in testing a larger solar panel charging unit. The battery does not take long to charge and discharge as it has very low capacity.
Worth a look if you have battery projects. Core Electronics have a larger range up to 2400mAh in the same style. A number of my projects have used them. The Adafruit Charger works very well charging them.
Cheers,
Jim
(btw I am a Core customer, I get nothing for recommending their products, but if it works good I will say)