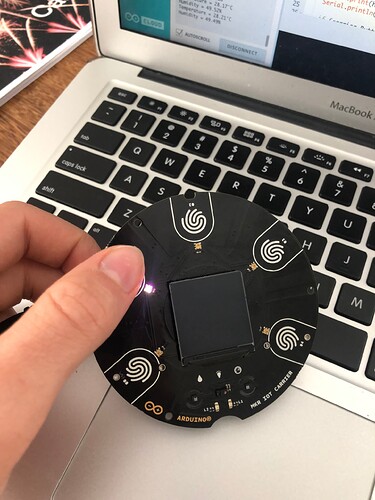
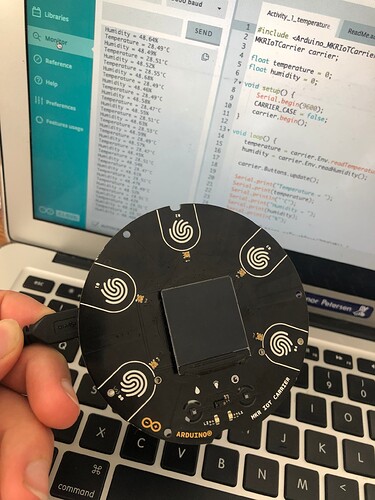
I am doing the first project in the Arduino Explore IoT list. It involves reading a weather sensor (temperature and humidity). I was able to see real time readings for both of these through the serial monitor, however i was not able to get the reading on the MKR IoT carrier display when pressing a button. I used the debugging codes in the help library to determine that all the buttons worked. I also tried all the display test codes but none of them showed a response on the display, despite other parts of the board working such as lights. Trying to work out if there’s something else i can try or if carrier display is faulty.
Hi Grahame,
Thanks for posting on the forum 
No worries, we’ll see what we can do to help. Firstly, if possible can you please post a photo of how you’ve got this set up and link the .ino file that you’re using in order to output to the display? We’ll take a look at what’s going on.
Thanks Bryce, much appreciated.
Have loaded link to ino and some pics, hope it’s helpful.
Regards
Grahame
Hi Grahame,
According to the Arduino Docs on the carrier library, there may be some things you need you need to add.
Try sticking this in your setup():
display.init(240, 240);
pinMode(TFT_BLACKLIGHT, OUTPUT);
digitalWrite(TFT_BLACKLIGHT,HIGH);
-James
Thanks James, tried but unfortunately no success? Can you see in the link?
When I tried inserting the code into the setup it originally gave me the error:‘display’ was not declared in this scope for line 11, which is: display.init(240, 240);. I tried changing this line to: carrier.display.init(240, 24);, but then it gave me the error: ‘TFT_BLACKLIGHT’ was not declared in this scope, for the next line. I am not sure what these two error messages mean? Any further suggestions?
Hi Grahame,
Seems this product is a bit of a mess documentation-wise, as there are two different revisions of the carrier board with two different screens.
Easy fix that may work: Change BLACKLIGHT to BACKLIGHT in your code (I’m almost certain this isn’t a typo in the Arduino docs, but I’d hate for you to go digging deeper than you needed to:
From the look of things, the backlight is driven by an LED driver IC (U3 below) commanded by the BACKLIGHT pin:
Which is then connected to DISP_BL, which is connected to Pin 3:
So if the typo fix didn’t work, try changing it to Pin 3.
At the end of all this, it may just be a faulty board. Did you get the kit from us? We might want to do some testing on a unit from stock, or start an RMA.
-James
Thanks James, appreciate your response.
I changed Blacklight to Backlight - this time i didn’t get an error message in the code but the screen still didn’t show anything.
I also tried changing it to PIN3, Pin3 and pin3 but they all gave an error message.
The Arduino Explore IoT kit was purchased from Core Electronics, and the carrier/display is part of the kit.(The SKU Product code is AKX00027).
Is there anything else we can try, or should we assume that the carrier/display part is faulty? Am keen to be able to use the kit!
Thanks
Grahame
Hey Graham,
I should have been more literal, just the number “3” not “Pin 3”.
But it does seem like a faulty product. If you don’t have anything you think might work on your end, get in touch via email, and we’ll take it from there.
-James
Thanks James. I tried just “3” it gave no error message but no success with the display. I’ll contact you via email.
Cheers
Grahame


