This is a placeholder topic for “Capacitive Soil Moisture Sensor (v2.0)” comments.
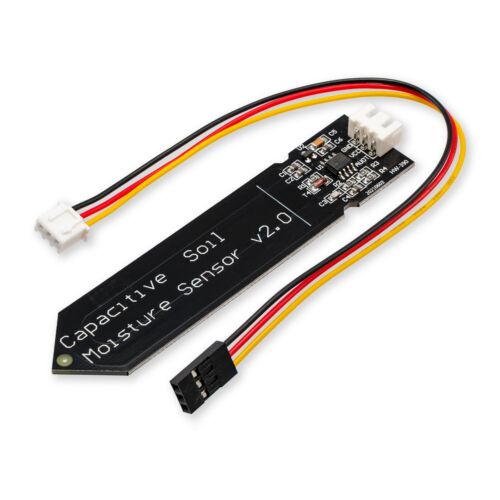
Check-in with your plant friends, this sensor is great for detecting soil moisture levels!
Read moreThis is a placeholder topic for “Capacitive Soil Moisture Sensor (v2.0)” comments.
Check-in with your plant friends, this sensor is great for detecting soil moisture levels!
Read moreLooking to hook this up to the glowbit rainbow. Given that the sensor has an analogue out, I may not need an SBC in the loop at all?
What would you recommend I use to have a glowbit rainbow talk to this Soil Sensor?
Hello,
This sensor has an analogue output and the glowbit rainbow uses a digital 1-wire input, so there isn’t a nice way to connect one to the other without some processing in between.
A single board computer would be overkill, but something like a Raspberry Pi Pico microcontroller, or another microcontroller with a built in Analog to Digital Converter might be a good fit.
This looks like it will do the job.
I’ll give it a try ![]()
Hello,
Yes the trinket should work great, there is an analog input which you should be able to test with Arduino demo code, and the neopixel library should handle the GlowBit.
I can’t see any mention of power consumption?
My wife wants a means to detect garden moisture content in garden for auto watering so I was planning to use these (sealed and potted for outside use!) wired to a (solar powered) Zigbee controller but I need an idea of current draw so I can see how many I can use per Zigbee controller…
I have 8 ADC’s available, and about 80mA “spare”…
Hi Gary,
I measured one of these at 5.68mA (moving maybe 10uA either side depending on how hard I squeezed the sensor) at 3.3V to 5V, I’ll add that info to the product page soon ![]()
Thanks James ![]()
Hi Gary,
Another point worth bringing up with these types of sensors: Make sure that you remove power to the whole sensor when not using them, any AC or DC biasing on the circuit will rapidly speed up corrosion. (with the added benefit of reducing power consumption)
Thanks Liam, Good to know.
I was going to do remove power when not in use as the radio modules are solar powered and water only needs to be checked every few hours or so. Gary.
Are there any video tutorials of this product being calibrated?
I’ve plugged the sensor into an Arduino Due.
Red into 5v.
Black to Ground.
Yellow to Pin A0.
I’ve loaded up this code.
const byte SOIL = A0;

void setup() {
  Serial.begin(9600);
  iamHere(); //Feedback to say code started.
  int plant = analogRead(SOIL);
  Serial.println(plant);
}

void iamHere() {
  pinMode(LED_BUILTIN, OUTPUT);
  for (byte i = 0; i < 12; i++) {
    digitalWrite(LED_BUILTIN, i % 2);
    delay(125);
  }
}

void loop() {}
I’ve then tried putting the sensor in water (just the first 30mm) and running the code (value 920)
Then, having dried it off I ran it again (value 921)
Looks like I’m missing something. Is there an online example to follow?
Hi Pixmusix,
This is ringing alarm bells for me, the ADCs on the DUE can only measure up to 3.3V, and since this sensor is hooked up to 5V, it’s likely killed at at least one pin of your ADC, perhaps the entire peripheral depending on how it’s multiplexed.

What was your reason for picking a DUE?
I’d also mimic the Arduino analogRead() example and read in a loop, to rule out any transient effects:
int analogPin = A3; // potentiometer wiper (middle terminal) connected to analog pin 3
                    // outside leads to ground and +3.3V
int val = 0;  // variable to store the value read

void setup() {
  Serial.begin(9600);           //  setup serial
}

void loop() {
  val = analogRead(analogPin);  // read the input pin
  Serial.println(val);          // debug value
}
Another thing to try to make sure the sensor is working is to hook it up to a supply voltage and measure the output with a multimeter, that way there are definitely no software or microcontroller quirks getting in the way.
Keen to get your project back on track!
EDIT: Got caught copying and pasting code that has comments mentioning 5V, changed that to 3.3V
Thanks so much for jumping in an assisting me. ![]()
The truth is I didn’t. I actually bought The Trinket. I realised there was no serial monitor using the trinket making calibration difficult. After spending 2 hours looking through Wild Hacks and Installing dotNet2.0 ![]() to run Amature Radio favourite ComOCom I decided that a simpler solution was just to grab the due and use that for calibration.
to run Amature Radio favourite ComOCom I decided that a simpler solution was just to grab the due and use that for calibration.
Ah! Good idea. I’ll do that.
Ah interesting! That’s almost certainly what’s happened. I might plug in an pot and run that script to check what I broke.
Want to clarify @James : The comment on line 1 of the example cpp code.
int analogPin = A3; // potentiometer wiper (middle terminal) connected to analog pin 3
                    // outside leads to ground and +5V
Why is it +5v?? Isn’t the idea to use the safer 3.3V?
Oops, looks like James took that from an Arduino Reference page from when everything was at 5V! Hopefully someone will edit that out to eliminate confusion!
Great. Thanks for clarifying. I’ll follow the same code with a 3.3V power-supply.
I ran the code above (with 3.3V) on the A0 pin.
Seems like everything works based on my clean sweep below.
15:43:58.153 → 1023
15:43:59.149 → 686
15:44:00.138 → 471
15:44:01.135 → 340
15:44:02.148 → 237
15:44:03.111 → 237
15:44:04.146 → 237
15:44:05.131 → 236
15:44:06.140 → 0
I’ll go buy myself a multi meter and check the sensor too.![]()
Hello,
That looks pretty good to me, and highly recommend picking up a multimeter, they are about the best bang for buck tool you can own when it comes to troubleshooting.
@Trent5487676 does Core Electronics sell one you recommend for beginners?
Hello,
When you’re just starting out a basic multimeter will have 90% of the functionality of a more expensive unit and do most of what you need.
This one is the cheapest we sell and will cover most of the measurements you will need to make, the catch is it doesn’t have an autoranging feature and it won’t power off automatically, so if you forget you’ve left it on the batteries will go flat.
This unit is much the same and adds auto-ranging of measurements, and an auto-power-off feature.
More expensive meters will have greater measurement accuracy and resolution, but for most people that’s not necessary. Other features like true-RMS measurement of AC are also nice, but again, most users won’t ever use that feature.
Thanks for your time @Trent5487676.
In the end I’ve borrowed a multimeter from my brother in law. ![]()
Nothing wrong with the device. (but I will buy a multi-meter for myself soon).
I just was not immersing it deep enough into the water.
As per this diagram, you need to bury this thing fairly deep. (I was just inserting the tip into water).
After being a little braver, I managed to get good calibration. Thanks for your help @James and @Trent5487676.
And you can get our latest projects and tips straight away by following us on:
![]()
![]()
![]()
![]()