I have just shared content in Guides > Raspberry Pi: “Lightning Sensor with a Raspberry Pi Single Board Computer - 40 KM RADIUS RANGE!”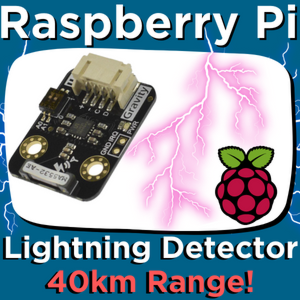
Read more
4 Likes
I was not familiar with the sensor. Thank you.
2 Likes
This is great! I just saw the video on YouTube. Has anyone connected one of these to an ESP32 yet?
2 Likes
Heyya Marvin,
Glad you dig it ![]() here is a very well-documented project using an ESP8266 and the AS3935-based Franklin Lightning Detector —> GitHub - shred/kaminari: AS3935 and ESP8266 based Franklin Lightning Detector
here is a very well-documented project using an ESP8266 and the AS3935-based Franklin Lightning Detector —> GitHub - shred/kaminari: AS3935 and ESP8266 based Franklin Lightning Detector
It connects to a WiFi network and offers a JSON web service for detected lightning strikes.
The communication between the two boards is done through SPI so I would recommend using the Sparkfun Version of the Lightning Detection board as it has easily accessible breakouts for SPI Communication. Find it here —> SparkFun Lightning Detector - AS3935 | SEN-15441 | Core Electronics Australia
Here is a number of ESP8266 Boards —> https://core-electronics.com.au/catalogsearch/result/?q=esp8266. These are boards that are very similar to the ESP32, just the earlier version. Check here to learn more about Nomenclature - Understanding ESP32 Naming Conventions - Tutorial Australia
Hit us up if you want to know anything else,
Kind regards,
Tim
5 Likes
Out of curiosity is their any chance of selling these with pre-soldered on headers as I purchased one and proceeded to solder the headers and connect the wires but get no red light leading me to believe I stuffed up the soldering as I’m a complete novice???
I was mindful to follow the pins so not to use 5v and the board gets warm when plugged in so I was hoping to get a spare but knowing my luck I’ll end up doing the same thing and it ain’t necessarily a cheap device with the alternatives equally costly or requiring soldering above my competency levels…?
Hi Tim.
Just had a read and look at your video.There is one thing that has me puzzled though. How is this (wonderful little device) going to assist lightning photography. Surely this has to provide a result after the event so by the time a shutter gets opened the strike has gone or on the tail end of its display.
Cheers Bob
2 Likes
Hi Razor
This might be a good time to get yourself a decent temperature controlled soldering iron, do a bit of research into the task and get some practise. In this business you won’t get too far down the track without having to do some soldering. Core and other manufacturers try to make experimenting and doing things as solderless as possible but this has got to stop somewhere. Impossible to foresee all situations.
Cheers Bob
2 Likes
Hi Robert93820,
Thanks for the helpful comment and guess its all down to practice makes perfect as I have a suitable soldering iron and Core Electronics did provide a helpful task card showing the steps and what to look out for so I’ll go back and see if I can fix my mistake or all else failing get a spare sensor and rewatch Tim’s video as he makes it all look so simple and my attempt looks OK so maybe I missed a step with the scripts…?
Thanks again for the help!
1 Like
Hi Razor
So true.
With this sort of thing there is only a limited amount of help one can provide remotely. The rest is up to the individual (you). If you have a lot of trouble a bit of face to face instruction can be invaluable if you can find or arrange it.
Unfortunately there are those who regard this as some sort of menial task they have got to put up with. Tell that to the technician who has to effect a repair out in the middle of nowhere and the culprit was a very poor and unreliable solder joint. So you can see that it can be quite important.
It is so important that some years ago a colleague was sent on a “high reliability” soldering course. This involved would you believe 6 weeks in USA. But he did return with qualifications to instruct others.
If you are interested Google “high reliability soldering”. Some of the info might surprise you. Especially the info about Gold being unreliable unless special techniques are utilised.
Cheers and good soldering. Bob
3 Likes
Hey mate,
If you pop an image of your hardware through we will best be able to diagnose the issue.
Kind regards,
Tim
2 Likes
Heyya Bob,
Excellent question (I think its a wonderful device too ![]() ). My understanding is to the millisecond any kind of electromagnetic pulse in the right frequency for lightning will instantly activate (pull up) the | IRQ | pin (which can be used to trigger a camera). From reading the datasheet, straight from AMS, and other comrades’ guides on the AS3935 it has been deemed possible to get good images from that.
). My understanding is to the millisecond any kind of electromagnetic pulse in the right frequency for lightning will instantly activate (pull up) the | IRQ | pin (which can be used to trigger a camera). From reading the datasheet, straight from AMS, and other comrades’ guides on the AS3935 it has been deemed possible to get good images from that.
You won’t get the instant before the lightning hits but the lightning projects out so much light (and for a relatively long time if it is a hard enough strike) that there will be enough light for a camera to capture.
I do plan to put this to the test and shoot up a model rocket with magnet wire attached into some mean-looking clouds, but let’s keep that under wraps until that happens ![]() - Rocket-Triggered Lightning - YouTube
- Rocket-Triggered Lightning - YouTube
Kind regards,
Tim
2 Likes
Hi Tim,
Bob offered some trusty tips in your absence so I’ll look to post a few pics showing my attempts at soldering as from the naked eye the pins look good so might just be the script or I have the wiring wrong as tried by using a Pi 400 with header adaptor…?
Cheers guys!
1 Like
Hi Tim
With my sort of luck the camera would be pointing the wrong way every time it went off.
Following are some pics of the Icelandic volcano eruption of some years ago. It seems it generated some pretty good lightning strikes just to top everything off. I don’t know who took the pics but going by star movement they used the tried and proven method of leaving the shutter open for some time and waiting for something to happen.


Cheers Bob
5 Likes
Stunning ![]()
![]()
![]() !
!
Thank you very kindly for sharing!
1 Like
What is the connector type? I see it uses I2C but it looks too big for Qwiic. I’m wanting to connect to the Qwiic on my recently acquired Feather ESP32-S3. Is it Grove, so an adapter cable like this would do the job? Qwiic Cable - Grove Adapter (150mm) | Sparkfun PRT-15109 | Core Electronics Australia
2 Likes
I guess nobody knows? I also asked on the DFRobot website and crickets there, too.
Hey mate,
My bad I got tangled up in the weeds of it all. The DFRobot Gravity connector’s real name is a JST PH 2.0mm Pitch 4-Pin Variant. The Qwiic connector’s real name is the JST SH 1.0mm Pitch 4-Pin Variant. Note that the order of the wires can be different between these two connector types.
I’m sure there is a connector out there that can facilitate your requirements, I just haven’t found one yet. It would definitely be possible to crimp your own version. I’ll chat with support and see if they may know something more.
Kind regards,
Tim
2 Likes
Hello,
The short answer is there isn’t one cable that goes from the Gravity connector to the Qwiic connector and maintains the same pin numbering sequence, so your best bet is to use this cable alongside the one that comes with the Gravity sensor and match the pin order as you connect them.
The long answer is each manufacturer has their own ecosystem with a few little quirks and differences which makes trying to interface between them a lot harder than it needed to be.
Qwiic is an open standard, which SparkFun came up with. Adafruit has adopted it for STEMMA QT, and we use it for PiicoDev. So at 3.3V everything using either Qwiic, STEMMA QT, or PiicoDev in the name is fully interchangeable.
Gravity is also I2C but they use a JST PH connector instead of a JST SH like the Qwiic system, they also reorder the pin numbers.
Grove is I2C but with a proprietary connector that Seeed Studio made up, so you’ll always need an adaptor there.
Adafruit’s what is STEMMA guide is currently the most up-to-date document on what ecosystems are compatible and what the changes are between them.
4 Likes
Thanks so much Tim and Trent!
Yes, the multitude of connectors is a pain in the neck. Thanks for confirming them for me.
I looked a bit more after your post and see that DFRobot have both a bucket load more sensors, and an I2C hub. I think I can use one of the hubs and then fashion a cable to hook it into my Adafruit gear. I suppose I could design my own hub with the different connectors and have it made. Or perhaps it’s an idea for a PiicoDev product? One I2C hub to rule them all? ![]()
My wife is a foul weather nut and if she had her 'druthers she’d be a full-time storm chaser. I managed to get my hands on an old wooden Stevenson screen that I’ve been restoring. It’s nearly time to fill it with just about every environmental sensor I can lay my hands on. The lightning sensor is a must have. ![]()
4 Likes
Hi dThirteen,
Ideally, every manufacturer would just adopt the Qwiic standard. Pimoroni also started making parts using the Qwiic connector standard but I think they were calling them Maker Ports??
So that’s 4 of the main manufacturers in this space that are intercompatible, even if it’s not outwardly promoted since everyone has their own brandname for the connection system to try and differentiate their ecosystems.
There’s some more info on Qwiic here if you’re interested.
https://www.sparkfun.com/qwiic
Best of luck with your weather sensor project ![]() maybe post some photos back to the forum as you work on it?
maybe post some photos back to the forum as you work on it?
4 Likes