Hi All,
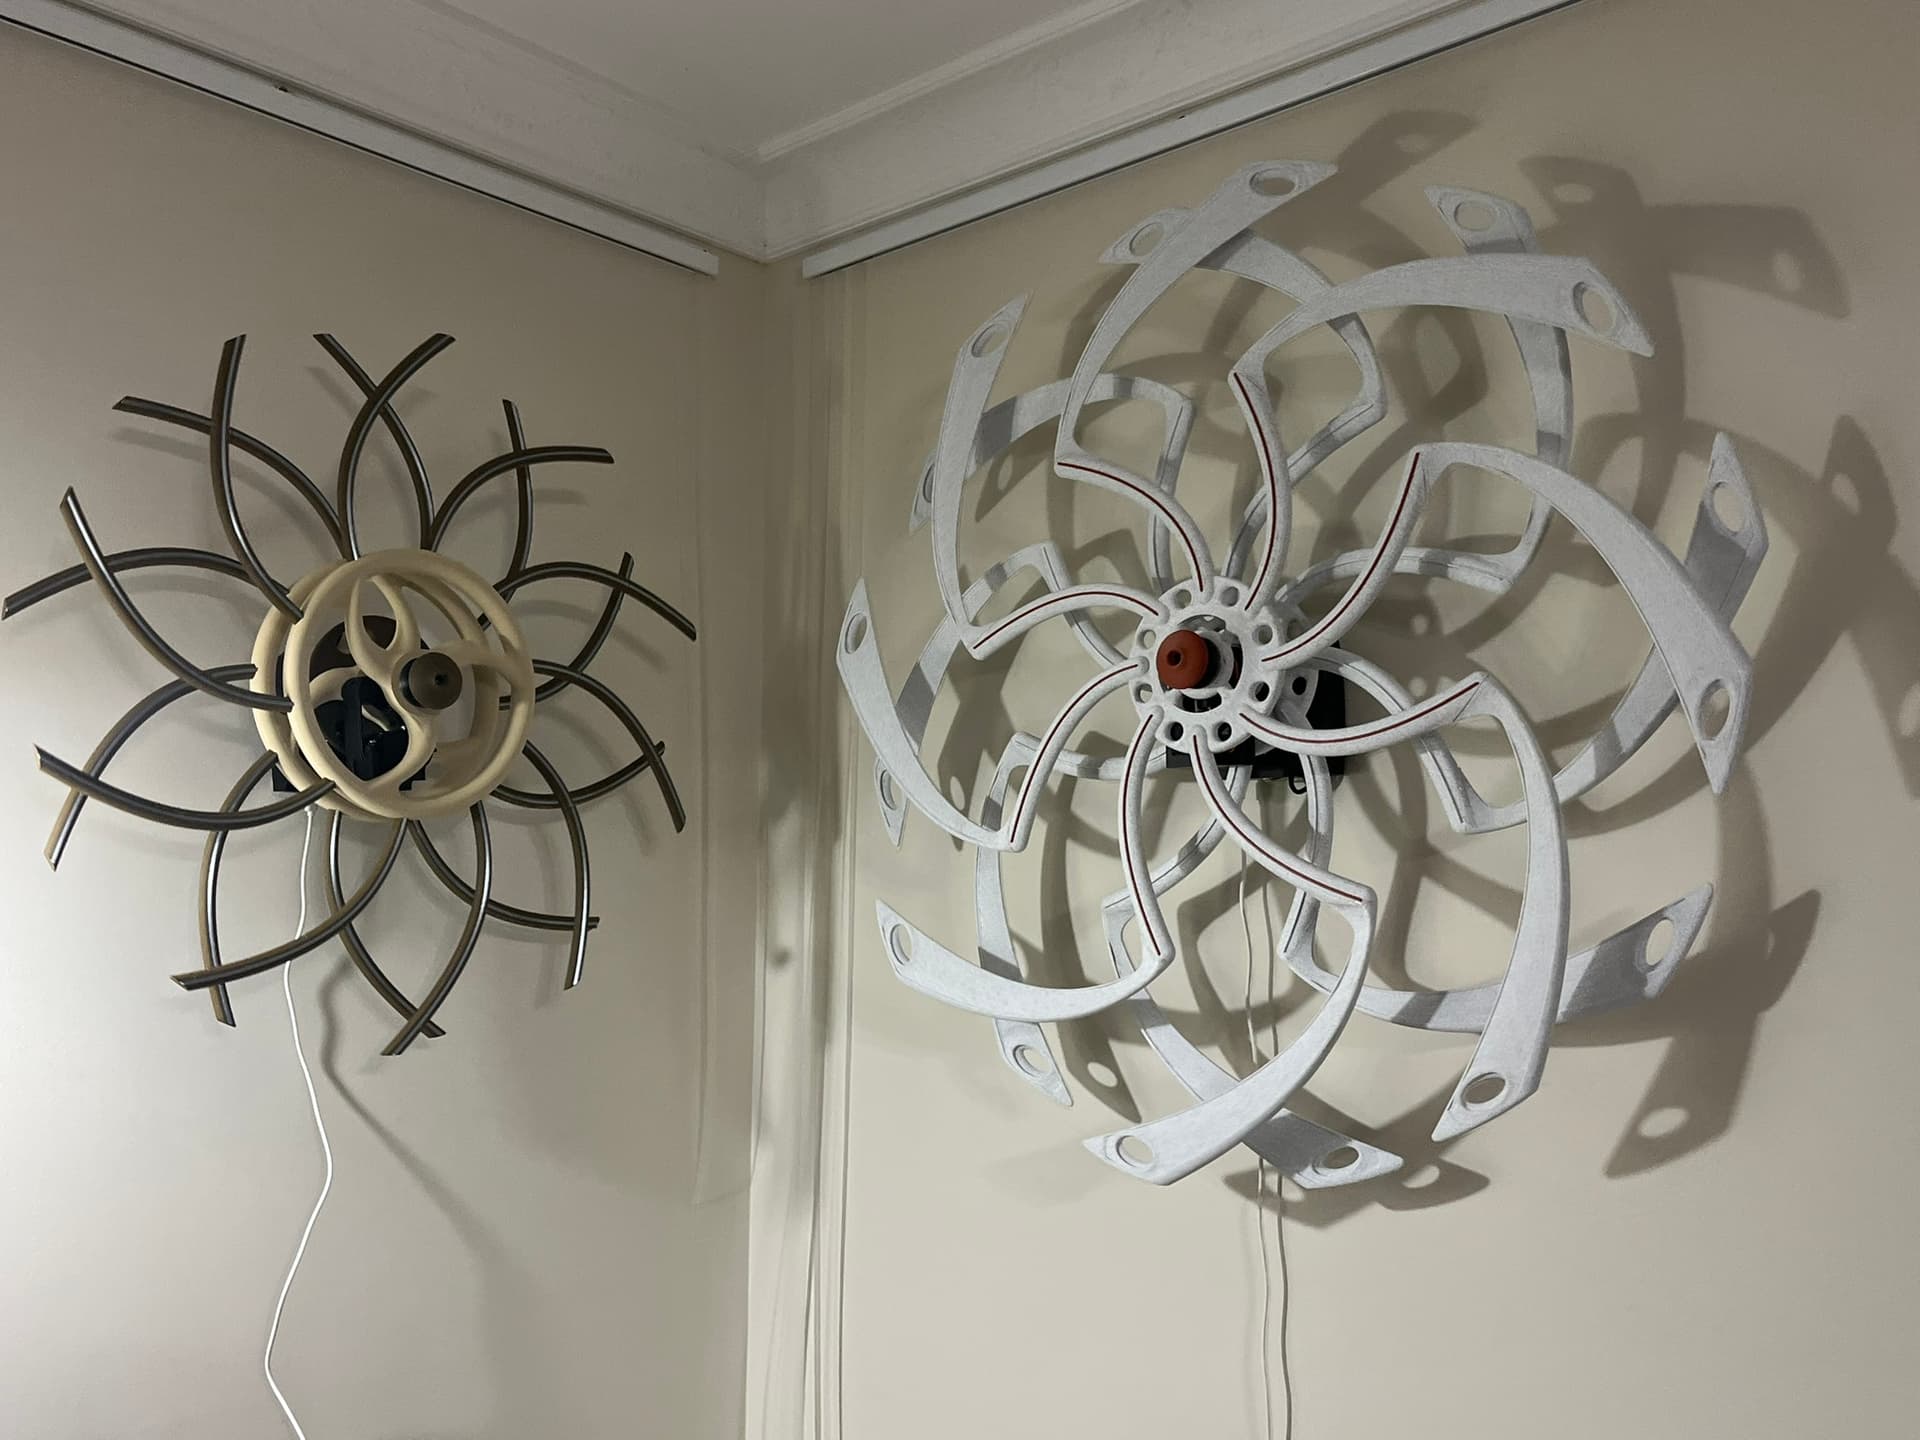
Thought I’d share 2 items just completed that are dynamic and interactive Kinetic wall art driven by Piicodev modules and Pi Pico 2.
The concept is for 2 sets of arms to rotate autonomously and independenly to create infinite patterns that never repeat.
In addition a hand gesture controls mood from “mild” to “wild” to raise or lower speeds and durations to create just the atmosphere you want!
A video attached will show the artworks in action. Stills show various aspect from components to construction.
The Piicodev system was used extensively due to packaging and coding convenience. Ready to go libraries to get immediate results and easy connections were both strong factors for selecting Piicodev.
I am not an “electronics” person as such.. but a life long technical software developer who needed to get things up and going quickly and conveniently so I could concentrate on software design.
Approx 1,000 lines of Microphython code on a Pi Pico 2 was developed from scratch to create the characteristics needed for such a system to work with 8 numerical values driving the dynamics and are constantly updated.
1 - Randomly selected speed and direction for front arms
2 - Randomly selected duration of running for front arms at a given speed
3 - Randomly selected duration of ramp to change speed at the end of running to a new randomly selected value
4 - Randomly selected speed and direction for rear arms
5 - Randomly selected duration of running for rear arms at a given speed
6 - Randomly selected duration of ramp to change speed at the end of running to a new randomly selected value
7 - Hour long “breathing” cycle to vary range of speeds able to be selected from
8 - Hand gesture to bias selections from more to less active at any time, also can gesture to reset to starting defaults
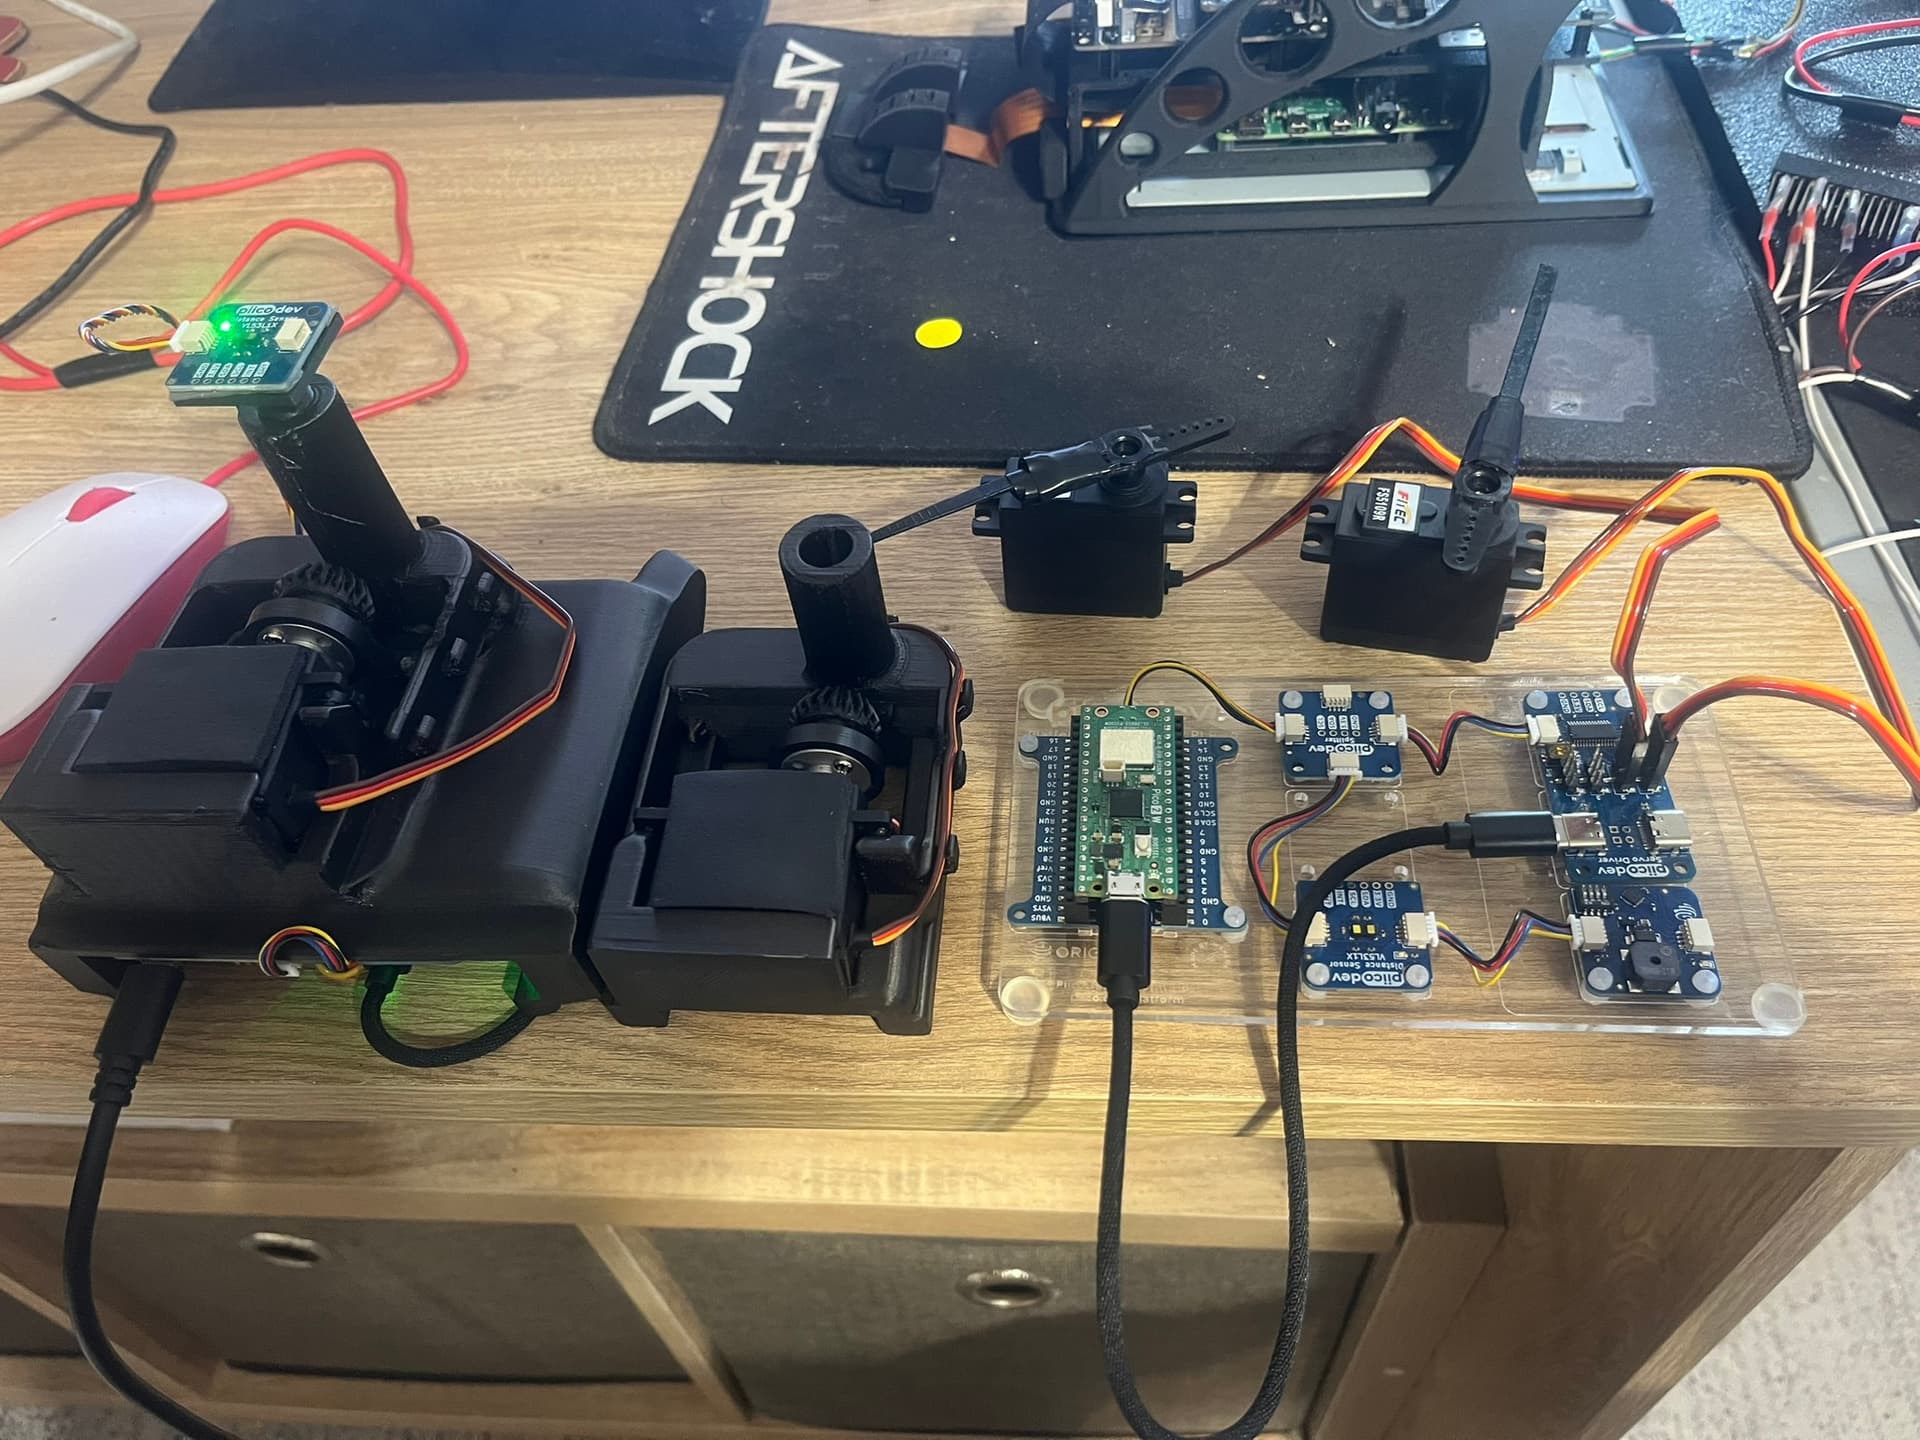
3D printing was extensively employed to create hubs, servo mounts and arms which make up the artwork. All designs done from scratch using Plasticity. 3D printing done with Bambu A1.
The only mechanical purchase was a pair of bearings (Bunnings) to mount in the hub to provide rotation around a hollow shaft which allowed for servos to be mounted to each hub for direct bevel drive and also for wiring to run from front to back..
The rear servo mount hangs on the wall and where the brains live.. each servo then sits out in front with each hub.. then finally a laser sensor right out front (inside decorative cap) to capture hand gestures.
Apart from Bunnings all other parts as per Core-Electronics catalogue:
- 2 x rotational servo FS5109R
- Pi Pico 2 WH
- Piicodev Lipo Expansion Board
- Piicodev Servo driver
- Piicodev Laser distance sensor
- Piicodev Buzzer (feedback for scaling/reset acknowledgement)
- Piicodev splitter and cables
I created a barebones test rig with all components to efficiently test software versions without adding complexity of gears, hubs, mounts etc which are another whole world to deal with!
After the designs then considerations of construction, tolerances, alignments, fittings and so forth are not to be under estimated as to ability to impact the final working whole.
More hours than I care to record to make it all happen from scratch to public worthy display (just did 2 days solid running at a local country show).. Started in April with nothing and now completed to a commercial standard ready to sell.
A display at a major art event is scheduled in a few weeks where these and Kinetic Art project #2 will be up for even wider publical display.
It looks as though video can’t be uploaded to show moving so will post stills..
Alex