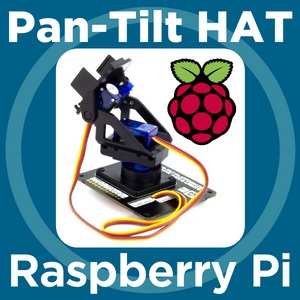
Setting up a Pan and Tilt system has never been easier with absolutely no soldering required! The Pimironi Picade Pan-Tilt Hat lets you mount and control a pan-tilt module right on top of your Raspberry Pi palm-sized computer meaning you can always keep the action in frame. The Hat’s onboard microcontroller and cleaver packages let you independently drive the two servos (pan and tilt) very simply, as well as powering up to 24 regular LED or NeoPixel RGB LEDs . There’s also a handy slot through which you can route the servo, LED, and camera cables elegantly through the PCB. Ideal for a mini-CCTV system, or to mount a set of eyes on it to make a friendly robot out of it, this set of horizontal and vertical motion servos will give you movement with a minimum of fuss and is ripe for some creativity.
Thank you for the great tutorials and example codes. I used your tutorial to assemble my Pimoroni Pan Tilt HAT, and then downloaded your KeyboardPanTilt.py. It came up cleanly, but crashes when the edges of the pan/tilt ranges. I put in fixes to the if-tests on the range and fixed the problem. Also put in a few comments here and there. Do you want the modified code? If so, where should I send it?
That sounds awesome mate! Very keen to check out your code. I definitely appreciate any improvements to any tutorial scripts . So long as it is not too much longer than the original you can chuck 3 backticks ( ` ) on either side of the code. The forum should then stick a scrollbar on the code so that it won’t take up the whole thread.
I’ll test it out here then, so long as you’re happy to allow it (and naturally be acknowledged in the code), I’ll make it the main script in the guide.
Absolutely happy to offer the minor bug fixes as unrestricted open source. Thanks for posting it in the first place. Next I am going on to your tutorial on finding faces in the camera images. I’ll let you know if I find anything. I really enjoy your YouTube vids and tutorial docs. All the best.
#===================================================================================
# Name: panTiltKeyboard.py
#-----------------------------------------------------------------------------------
# Purpose: Control a Pimoroni two degree of freedom Pan-Tilt Hat for the
# Raspberry Pi.  It uses the curses package to catch presses of the left/right
# and up/down arrow key presses and pan and tilt the head in response.
#-----------------------------------------------------------------------------------
# Language: Python 3
#-----------------------------------------------------------------------------------
# Authors:  Code was posted by Core Electronics (Tim) here:
#           https://core-electronics.com.au/tutorials/pan-tilt-hat-raspberry-pi.html
#===================================================================================
# Updates and bug fixes
#===================================================================================
#  Dec 9, 2021  Fixes to keep the pan/tilt code from crashing if the
#  arrow keys are used to go outside the +/- 90 degree ranges on pan/tilt.
#-----------------------------------------------------------------------------------
#  Dec 12, 2021 Minor formatting changes and variable names for readability.
#===================================================================================
#must be run from Pi's terminal!
#use code "python KeyboardPanTilt.py" after you cd into the correct folder!

#importing required libraries
import curses
import os
import time
import picamera
import pantilthat

# Initialize camera
camera = picamera.PiCamera()
camera.resolution = (1024, 768)
camera.start_preview(fullscreen=False, window = (100,20,640,480))

# flipping the camera for so its not upside down
camera.vflip = True
camera.hflip = True

# Set up key mappings and curses for arrow key responses
screen = curses.initscr() # get the curses screen window
curses.noecho()           # turn off input echoing
curses.cbreak()           # respond to keys immediately (don't wait for enter)
screen.keypad(True)       # map arrow keys to special values

# initialize pan and tilt positions and process increments driven by arrow keys
# set start up serrvo positions
a = 0.0
b = 0.0
pantilthat.pan(a)
pantilthat.tilt(b)
# set arrow key delta
deltaPan=1.0
deltaTilt=1.0

picNum = 1  # Initialize picture number

# Process active key presses:
# -- Letter p will take a picture and store file name image[picNum].jpg,
#     where [number] increments over a picture taking session.
# -- Arrow keys will control the Pan Tilt Camera (deltaPan/deltaTilt Degree angles)
# -- Letter q will quit the application,
try:
    while True:
        char = screen.getch()
        if char == ord('q'):
            #if q is pressed quit
            break
        if char == ord('p'):
            #if p is pressed take a photo!
            camera.capture('image%s.jpg' % picNum)
            picNum = picNum + 1
            screen.addstr(0, 0, 'picture taken! ')
        elif char == curses.KEY_RIGHT:
            screen.addstr(0, 0, 'right ')
            if (b - deltaTilt ) > -90:
                b = b - deltaTilt
            pantilthat.tilt(b)
            time.sleep(0.005)
        elif char == curses.KEY_LEFT:
            screen.addstr(0, 0, 'left ')
            if (b + deltaTilt) < 90:
                b = b + deltaTilt
            pantilthat.tilt(b)
            time.sleep(0.005)
        elif char == curses.KEY_DOWN:
            screen.addstr(0, 0, 'down ')
            if (a + deltaPan) < 90:
                a = a + deltaPan
            pantilthat.pan(a)
            time.sleep(0.005)
        elif char == curses.KEY_UP:
            screen.addstr(0, 0, 'up ')
            if (a - deltaPan) > -90:
                a = a - deltaPan
            pantilthat.pan(a)
            time.sleep(0.005)

finally:
    # shut down cleanly
    curses.nocbreak(); screen.keypad(0); curses.echo()
    curses.endwin()
Absolutely brilliant script just tested it out then! Have updated the guide page and download section with this new script. Very glad you dig the tutorials, hope your adventures with the next ones are just as successful. If you run into any issues just reach out, I’m always more than happy to help.
Dude great write up. Was exactly what I had been looking for. You really do need to get credit card transactions working off you site for purchases as PayPal is crap and I reside in NZ.
Maybe outside this guide (which works great - thank you) but I also tried connecting an 8 LED Neopixel Strip (not Adafruit) to the pimoroni hat as described and got weird results with the addressing. It would only respond to indexes 0-5 which lit all 8 LEDs in varying adjacent combinations and colours. Same LED strip works perfectly connected to the RPi directly (5v and GPIO18) as per your 2812B LED guide. Doesn’t seem to be a voltage issue as the pimoroni pantilt hat schematic indicates the LED connection is 5v!? Any idea why this doesn’t work as expected??
When referring to WS2812B LEDs they use this kind of syntax in scripts | pantilthat.set_pixel(0, 255, 0, 255) |. The arguments are index, from 0 to 23, followed by the amount of red, green, and blue which range from 0 to 255. Then to make them illuminate you add the line | pantilthat.show() |
Come pop through your script and a photo of your set up and I’ll best be able to help if that doesn’t sort you out.
Hi Tim
Oops! I just had another look at this and I found that in my code initialisation I had incorrectly set the light type to an SK66812 option with pantilthat.light_type(GRBW)
… after correctly setting the light mode as WS2812 for my LED strip in the previous line. Everything else was fine.
As soon as I changed the light type to GRB it all runs as expected. I should have picked that up earlier!
Hey Tim,
I need an urgent help on this matter.
(Your work is amazing btw)
I couldn’t get my hands on Pimoroni Pan tilt hat but I have a ordinary pan tilt bracket. Can you please suggest me how can I manage with that.
Thanks in advance
Hi @Kushagra264841 - it’ll be really helpful if you can provide some pictures that include the connectors and as much data as you can about the unit you have.
If I just connect the servo motors to GPIO used by Pimoroni Pan tilt hat to Rpi and run the code, I get this error.
Traceback (most recent call last):
File “/home/kushagra/pan tilt hat/smooth.py”, line 17, in
pantilthat.pan(a)
File “/usr/lib/python3/dist-packages/pantilthat/pantilt.py”, line 466, in servo_one
self.setup()
File “/usr/lib/python3/dist-packages/pantilthat/pantilt.py”, line 80, in setup
self._set_config()
File “/usr/lib/python3/dist-packages/pantilthat/pantilt.py”, line 118, in _set_config
self._i2c_write_byte(self.REG_CONFIG, config)
File “/usr/lib/python3/dist-packages/pantilthat/pantilt.py”, line 209, in _i2c_write_byte
raise IOError(“Failed to write byte”)
OSError: Failed to write byte
The output of sudo i2cdetect -y 1 indicates that no devices are currently detected on the I2C bus with addresses in the commonly used range (0x03 to 0x77).
I have Raspberry Pi model 3b+ and buster os along picamera rev1.2. The servos are sg-90s
The Pan-Tilt HAT uses an onboard I2C PWM driver to drive the servos. You cannot plug servos directly into the Pi and expect the same code to work.
However, the Pi can drive servos directly - you just might see a little jitter in the servo movement. We have a guide all about it. Try getting one servo working by itself, then add the second
will provide the I2C-to-servo connection that is missing from your pan-tilt head. That will enable it to work in the same way as the Pimorini unit, but changes to the code will likely still be required.
Thanks Michael for this guide. What I understand from this is basically I have to replace all the code in which PanTiltHat is utilised and replace it with this kind of code to control the code. I am onto it. Also please mention if any further tweaks are required here and there. Thanks.
Thanks Michael for listing this product. But due to my financial limitations I would firstly try the solution given by Michael as it avoids buying new stuff. If it doesn’t work I will try it too. But nevertheless it was very useful piece of information. Again thanks a lot man.
 . So long as it is not too much longer than the original you can chuck 3 backticks ( ` ) on either side of the code. The forum should then stick a scrollbar on the code so that it won’t take up the whole thread.
 just tested it out then! Have updated the guide page and download section with this new script. Very glad you dig the tutorials, hope your adventures with the next ones are just as successful. If you run into any issues just reach out, I’m always more than happy to help.


