This post was a great help! Thank you. I have an additional thought/question: Would it be possible to use an ultrasonic sensor (HC-SR0) to generate color values? I’m thinking of a Halloween prop that would change eye color based on the distance between the prop and a “participant.” If this isn’t the right place to bring this up could you point me in the right direction?
Hey Evan 
Thanks for making a post! I’ve split your post off into its own thread.
It’s definitely something that’s achievable - it just depends on the effect you’re chasing. You could map a distance range to hue at constant brightness, or perhaps just a small range (eg. start off dim and orange and increase to bright red). WS2812s give you 24 bit colour so you should have no issues with smoothness whatever colour range you choose.
A simple linear interpolation between two colour points would be the simplest way to do it, so you’d choose a distance range - map the max distance to 0% and the minimum distance to 100%. In the Arduino IDE this is as simple as using the map() function.
https://www.arduino.cc/reference/en/language/functions/math/map/
You could then use this three times for each of the Red, Green, and Blue channels to determine the intermediate colour.
1 Like
Thank you for the advice and encouragement. They are truly appreciated. I am attempting this on a Raspberry Pi Pico so I’ll probably try to get an integer based on min and max output values from the sensor since I’ll be working with micro python.
I found this bit of code that makes some sense but I need to tinker with it in context with some real sensor values to see if I can make it work. Any better ideas would be appreciated.
#Integer between out_min and out_max
def convert(x, in_min, in_max, out_min, out_max):
    return max(min(out_max, (x - in_min) * (out_max - out_min) // (in_max - in_min) + out_min), out_min)
Or perhaps I can just use the time elapsed between signal and echo. It is probably clear that I know just enough about this to get in trouble but not enough to see a clear solution. Thanks for patience.
Good morning Evan,
It will depend on what your sensor outputs are equal to as integer values, and whether or not your script that’s been set up correctly produces a linear relationship to represent the distance (sometimes there tends to be noise produced by ultrasonic sensors which may cause an awkward flickering of your LED if there’s no filter on the output) I’d suggest implementing a simple filter by storing a variable distance and then store your real sensor value as measuredDistance then simply update it by distance+=0.05*(measuredDistance-distance) before passing it over to updating your LED colour in your loop to remove most of the random noise generated, although it will be less reponsive to sudden changes, try playing with the constant 0.05 to see how sensitivity changes.
Here’s a class on GitHub that should get you setup with taking data from the HC-SR0 if you’re having issues with it. Best of luck with the project!
1 Like
Bryce, Thank you! I would not have expected the flicker. Your suggestion of a filter is helpful and easy enough to implement.
2 Likes
I am at the point where I can light the WS2812s and get just the red, green or blue and have used the sample code that does various fills, chases and rainbow effects. I now also have a stream of stable integer values coming from the HC-SR0 ultrasonic sensor. My end goal is to display “eye” colors in my Halloween prop that range from blue through green, yellow, orange and red based on distance from the prop. The closest values (shortest distances) should return red colors.
I know that the WS2812s can produce a smooth range of colors. That would be my first choice but I have been unable to figure out how to use the distance value to create that effect.
From my limited understanding and perspective it would be easier to take a range of distance values and assign them to a specific color. This could produce the desired effect for my project. My problem with this option is that I haven’t been able to figure out how to use a distance value to specify a particular color. Is there sample micropython code anywhere that would let me use one variable to choose a color?
Thanks!
Hey Evan,
Two things - what you’re looking to do is called mapping or parameterisation.
It’s when you take one number range, and stretch or smoosh it until it fits another number range. The closely related interpolation is where you take a position (say half way) between two numbers, and figure out what number it is - it’s usually used where you have a table of values, for eg. at 0.1x=1.5,0.2x=3.0,0.3x=4.5 etc. and you want to know what 0.27x is
Here’s the function you’re after:
https://numpy.org/doc/stable/reference/generated/numpy.interp.html
Secondly, you’re currently working with Red, Green, and Blue (RGB) values - but that’s not the only way to work with colours. For what you’re doing, it makes much more sense to work with Hue, Saturation, and Luminosity (aka Value) (HSL or HSV).
Open up your favourite paint editor, like MS Paint, and edit the colour, you’ll get a dialogue like this:
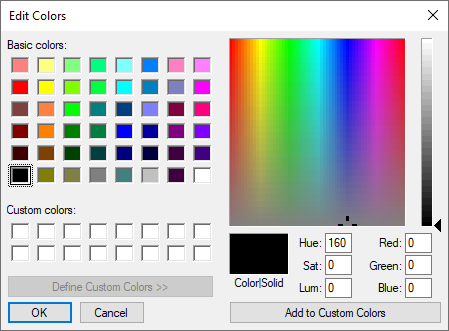
You can click and drag around to quickly get a feel for how the numbering system works. Better yet, here’s an online one:
https://hslpicker.com/
Thankfully, it’s not the first time someone’s done this, so there’s already a python library for it:
https://docs.python.org/3/library/colorsys.html
3 Likes
I’ve been playing with this concept and have made a little progress. If you’re interested check out the video linked here: Angry Eyes Version 1.
The effect is getting closer to what I was hoping for but still isn’t as responsive as I’d like. The pulsing in the red range is intentional. I’m still deciding if I like that.
I need to work on dealing with noise from the HC-SR04 ultrasonic sensor. I’ve tried several sensors and each one seems to have an issue with throwing unreasonably high values a fair percentage of the time. I need to study the code Bryce shared and see if I can figure out how to implement it here.
If you have time and inclination to look at my code you’ll see my rather inelegant way of dealing with it. Suggestions would be deeply appreciated. I also need a way to turn the whole thing on and off or at least shut the LEDs off when nobody is around (probably a PIR).
Regards,
Evan
MicroPython Code follows: (I hope I’m sharing this properly.)
import array, utime
from machine import Pin
import rp2

# Configure how long the eyes stay lit with a particular color
duration = 0.0001
# Configure the number of WS2812 LEDs.
NUM_LEDS = 2
PIN_NUM = 0
brightness = 0.2
#Input a "dist" variable seed to get started. Otherwise it returns an error.
dist = 300

@rp2.asm_pio(sideset_init=rp2.PIO.OUT_LOW, out_shiftdir=rp2.PIO.SHIFT_LEFT, autopull=True, pull_thresh=24)
def ws2812():
    T1 = 2
    T2 = 5
    T3 = 3
    wrap_target()
    label("bitloop")
    out(x, 1)               .side(0)    [T3 - 1]
    jmp(not_x, "do_zero")   .side(1)    [T1 - 1]
    jmp("bitloop")          .side(1)    [T2 - 1]
    label("do_zero")
    nop()                   .side(0)    [T2 - 1]
    wrap()

# Create the StateMachine with the ws2812 program, outputting on pin
sm = rp2.StateMachine(0, ws2812, freq=8_000_000, sideset_base=Pin(PIN_NUM))
# Start the StateMachine, it will wait for data on its FIFO.
sm.active(1)
# Display a color on the LEDs via an array of LED RGB values.
ar = array.array("I", [0 for _ in range(NUM_LEDS)])

def lights_on():
    def pixels_show():
        dimmer_ar = array.array("I", [0 for _ in range(NUM_LEDS)])
        for i,c in enumerate(ar):
            r = rr
            g = gg
            b = bb
            dimmer_ar[i] = (g<<16) + (r<<8) + b
        sm.put(dimmer_ar, 8)
        utime.sleep_ms(10)

    def pixels_set(i, color):
        ar[i] = (color[1]<<16) + (color[0]<<8) + color[2]

    def eye(pos):
        return (0,0,0)

    def eye_color(wait):
        for j in range(duration):
            for i in range(2):
                rc_index = (i * 256 // 1) + j
                pixels_set(i, eye(rc_index & 255))
            pixels_show()
            utime.sleep(wait)

    eye_color(0)

#Distance Measurement returning an integer value in cm. This will be used to determine the color.
trigger = Pin(3, Pin.OUT)
echo = Pin(2, Pin.IN)

def proximity():
    trigger.low()
    utime.sleep_us(2)
    trigger.high()
    utime.sleep(.01)
    trigger.low()
    while echo.value() == 0:
        signaloff = utime.ticks_us()
    while echo.value() == 1:
        signalon = utime.ticks_us()
    timepassed = signalon - signaloff
    distance = (timepassed * 0.0343) / 2
#Turn the distance into an integer and make the variable available in other loops.
    global dist
#Set a cut-off distance to try to eliminate sensor noise that returns incorrect high values.
    if distance >=450:
        pass
    elif distance <450:
#Trying a multiplier to adjust sensitivity.
       dist = int(distance*0.9)
#The line below is for debugging.
#    print("The distance from the object is ",dist,"cm")

while True:
    proximity()

    if dist <=50:
            rr = 255
            gg = 25
            bb = 0
            lights_on()

            rr = 255
            gg = 20
            bb = 0
            lights_on()

            rr = 255
            gg = 15
            bb = 0
            lights_on()

            rr = 255
            gg = 10
            bb = 0
            lights_on()

            rr = 255
            gg = 5
            bb = 0
            lights_on()

            rr = 255
            gg = 0
            bb = 0
            lights_on()

    elif dist <=51:
            rr = 255
            gg = 30
            bb = 0
            lights_on()

    elif dist <=52:
            rr = 255
            gg = 35
            bb = 0
            lights_on()

    elif dist <=53:
            rr = 255
            gg = 40
            bb = 0
            lights_on()

    elif dist <=54:
            rr = 255
            gg = 45
            bb = 0
            lights_on()

    elif dist <=55:
            rr = 255
            gg = 50
            bb = 0
            lights_on()

    elif dist <=56:
            rr = 255
            gg = 55
            bb = 0
            lights_on()

    elif dist <=57:
            rr = 255
            gg = 60
            bb = 0
            lights_on()

    elif dist <=58:
            rr = 255
            gg = 65
            bb = 0
            lights_on()

    elif dist <=59:
            rr = 255
            gg = 70
            bb = 0
            lights_on()

    elif dist <=60:
            rr = 255
            gg = 75
            bb = 0
            lights_on()

    elif dist <=61:
            rr = 255
            gg = 80
            bb = 0
            lights_on()

    elif dist <=62:
            rr = 255
            gg = 85
            bb = 0
            lights_on()

    elif dist <=63:
            rr = 255
            gg = 90
            bb = 0
            lights_on()

    elif dist <=64:
            rr = 255
            gg = 95
            bb = 0
            lights_on()

    elif dist <=65:
            rr = 255
            gg = 100
            bb = 0
            lights_on()

    elif dist <=66:
            rr = 255
            gg = 105
            bb = 0
            lights_on()

    elif dist <=67:
            rr = 255
            gg = 110
            bb = 0
            lights_on()

    elif dist <=68:
            rr = 255
            gg = 115
            bb = 0
            lights_on()

    elif dist <=69:
            rr = 255
            gg = 120
            bb = 0
            lights_on()

    elif dist <=70:
            rr = 255
            gg = 125
            bb = 0
            lights_on()

    elif dist <=71:
            rr = 255
            gg = 130
            bb = 0
            lights_on()

    elif dist <=72:
            rr = 255
            gg = 135
            bb = 0
            lights_on()

    elif dist <=73:
            rr = 255
            gg = 140
            bb = 0
            lights_on()

    elif dist <=74:
            rr = 255
            gg = 145
            bb = 0
            lights_on()

    elif dist <=75:
            rr = 255
            gg = 150
            bb = 0
            lights_on()

    elif dist <=76:
            rr = 255
            gg = 155
            bb = 0
            lights_on()

    elif dist <=77:
            rr = 255
            gg = 160
            bb = 0
            lights_on()

    elif dist <=78:
            rr = 255
            gg = 165
            bb = 0
            lights_on()

    elif dist <=79:
            rr = 255
            gg = 170
            bb = 0
            lights_on()

    elif dist <=80:
            rr = 255
            gg = 175
            bb = 0
            lights_on()

    elif dist <=81:
            rr = 255
            gg = 180
            bb = 0
            lights_on()

    elif dist <=82:
            rr = 255
            gg = 185
            bb = 0
            lights_on()

    elif dist <=83:
            rr = 255
            gg = 190
            bb = 0
            lights_on()

    elif dist <=84:
            rr = 255
            gg = 195
            bb = 0
            lights_on()

    elif dist <=85:
            rr = 255
            gg = 200
            bb = 0
            lights_on()

    elif dist <=86:
            rr = 255
            gg = 205
            bb = 0
            lights_on()

    elif dist <=87:
            rr = 255
            gg = 210
            bb = 0
            lights_on()

    elif dist <=88:
            rr = 255
            gg = 215
            bb = 0
            lights_on()

    elif dist <=89:
            rr = 255
            gg = 220
            bb = 0
            lights_on()

    elif dist <=90:

            rr = 255
            gg = 225
            bb = 0
            lights_on()

    elif dist <=91:
            rr = 255
            gg = 230
            bb = 0
            lights_on()

    elif dist <=92:
            rr = 255
            gg = 235
            bb = 0
            lights_on()

    elif dist <=93:
            rr = 255
            gg = 240
            bb = 0
            lights_on()

    elif dist <=94:
            rr = 255
            gg = 245
            bb = 0
            lights_on()

    elif dist <=95:
            rr = 255
            gg = 250
            bb = 0
            lights_on()

    elif dist <=96:
            rr = 255
            gg = 255
            bb = 0
            lights_on()

    elif dist <=97:
            rr = 0
            gg = 245
            bb = 10
            lights_on()

    elif dist >98<200:
            rr = 0
            gg = 255
            bb = 255
            lights_on()

    else:
            rr = 0
            gg = 255
            bb = 255
            lights_on()


    utime.sleep(.0001)
1 Like
I’ve made some progress! Here’s a video. https://youtu.be/IV56VNwBLwA
3 Likes
That’s a really awesome effect! Nice work! 
1 Like
PS, just looking at this again; you could really simplify your code
import array, utime
from machine import Pin
import rp2

# Configure how long the eyes stay lit with a particular color
duration = 0.0001
# Configure the number of WS2812 LEDs.
NUM_LEDS = 2
PIN_NUM = 0
brightness = 0.2
#Input a "dist" variable seed to get started. Otherwise it returns an error.
dist = 300

@rp2.asm_pio(sideset_init=rp2.PIO.OUT_LOW, out_shiftdir=rp2.PIO.SHIFT_LEFT, autopull=True, pull_thresh=24)
def ws2812():
    T1 = 2
    T2 = 5
    T3 = 3
    wrap_target()
    label("bitloop")
    out(x, 1)               .side(0)    [T3 - 1]
    jmp(not_x, "do_zero")   .side(1)    [T1 - 1]
    jmp("bitloop")          .side(1)    [T2 - 1]
    label("do_zero")
    nop()                   .side(0)    [T2 - 1]
    wrap()

# Create the StateMachine with the ws2812 program, outputting on pin
sm = rp2.StateMachine(0, ws2812, freq=8_000_000, sideset_base=Pin(PIN_NUM))
# Start the StateMachine, it will wait for data on its FIFO.
sm.active(1)
# Display a color on the LEDs via an array of LED RGB values.
ar = array.array("I", [0 for _ in range(NUM_LEDS)])

def lights_on():
    def pixels_show():
        dimmer_ar = array.array("I", [0 for _ in range(NUM_LEDS)])
        for i,c in enumerate(ar):
            r = rr
            g = gg
            b = bb
            dimmer_ar[i] = (g<<16) + (r<<8) + b
        sm.put(dimmer_ar, 8)
        utime.sleep_ms(10)

    def pixels_set(i, color):
        ar[i] = (color[1]<<16) + (color[0]<<8) + color[2]

    def eye(pos):
        return (0,0,0)

    def eye_color(wait):
        for j in range(duration):
            for i in range(2):
                rc_index = (i * 256 // 1) + j
                pixels_set(i, eye(rc_index & 255))
            pixels_show()
            utime.sleep(wait)

    eye_color(0)

#Distance Measurement returning an integer value in cm. This will be used to determine the color.
trigger = Pin(3, Pin.OUT)
echo = Pin(2, Pin.IN)

def proximity():
    trigger.low()
    utime.sleep_us(2)
    trigger.high()
    utime.sleep(.01)
    trigger.low()
    while echo.value() == 0:
        signaloff = utime.ticks_us()
    while echo.value() == 1:
        signalon = utime.ticks_us()
    timepassed = signalon - signaloff
    distance = (timepassed * 0.0343) / 2
#Turn the distance into an integer and make the variable available in other loops.
    global dist
#Set a cut-off distance to try to eliminate sensor noise that returns incorrect high values.
    if distance >=450:
        pass
    elif distance <450:
#Trying a multiplier to adjust sensitivity.
       dist = int(distance*0.9)
#The line below is for debugging.
#    print("The distance from the object is ",dist,"cm")

while True:
    proximity()

    while dist <=50:
            rr = 255
            bb = 0
            for x in range(5):
                gg = 5*x
                lights_on()

    while dist > 50:
            rr = 255
            bb = 0
            gg = 25 + round((dist-50)*5)
            lights_on()


    if dist >98<200:
            rr = 0
            gg = 255
            bb = 255
            lights_on()

    else:
            rr = 0
            gg = 255
            bb = 255
            lights_on()


    utime.sleep(.0001)
2 Likes
Awesome! That makes complete sense. Thank you for taking the time to teach me.
1 Like