This is a placeholder topic for “GlowBit™ Matrix - 8x8” comments.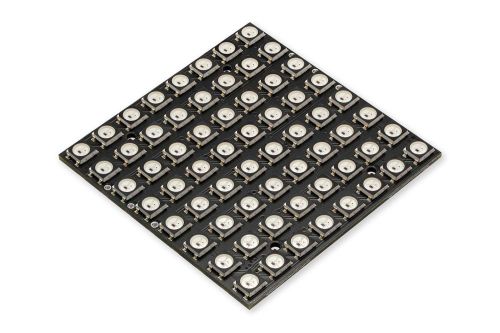
The most powerful GlowBit display! A 64 LED matrix that can be easily tiled to create larger displays.
Read more
1 Like
Hi. Hooked up a glowbit 8x8 to WLED with a nice 2.4A supply, and an esp32. It sort of works … up to the 47th LED, then nothing. Is there a known problem, or a gotcha here? Or is my 47th LED dead? Any ideas?
3 Likes
Ok. I had a spare GlowBit, replaced it. Now it works. Pixel #47 DOA.
2 Likes
Hi Colin,
Welcome to the forum and thanks for making a topic!
Unfortunately, it does sound like the GlowBit Matrix was faulty.
I’ve just sent an email through to you to hopefully make sure your projects stay on track!
Liam
2 Likes
Hi team,
Do you have a fully dimensioned diagram of the 8x8 matrix showing the spacing of the mounting holes?
I have found the overall dimensions (61mm x 61mm) on the product page, but nothing found (yet) for the mounting holes.
2 Likes
Hi Murray,
All of the design files are open sourced so you can open up KiCAD and measure in there ![]()
Upon opening it up the mounting pattern is 30.48x45.72mm

(a screenshot of the PCB layout in the Hardware repo)
Come Monday when the folks at Core see your reply the product page should be updated!
1 Like
Hi @Liam120347
Now loading up KiCAD etc and starting to learn it ( ex-AutoCAD drafting skills to work through )
Thanks
P.S. will the mounting kit work as ‘front-side’ spacers behind a perspex panel, or will they only fit behind the matrices?
New Question …
I note that there is a function to dynamically change the Glowbit rateLimitFPS value at any time within user code (i.e. stick.updateRateLimitFPS(40) etc).
However the brightness value is currently fixed upon initialisation…
Would this function definition work if added into the glowbit.py library just underneath the updateRateLimitFPS definition?
## @brief Set a new brightness value
#
# \param newBrightness A new value in range 0(? tbc) - 255
def updateBrightness(self, newBrightness)
  self.brightness = newBrightness
Noting that this affects the entire Glowbit object, not individual pixels
p.s. there is a reason for this - being a Lighting engineer, I like LED displays to ‘auto-tune’ the brightness relative to ambient so that a display may be at full power in sunlight, but dims down in the evening and further into the night…
1 Like
Hey @Murray125532 - the mounting kit will work on the back side only. The screw-head is small enough to fit between LEDs, but the standoff is just too large.
As for your feature request - we’re on it ![]()
Expect a new version of the library to come out soon. (We’ll update you here when it does).
2 Likes
Hi Murray,
A provisional method has been added to glowbit.py (line 327f: CE-GlowBit-Python/glowbit.py at main · CoreElectronics/CE-GlowBit-Python · GitHub).
The initialisation methods accept [0,255] integers or [0.0, 1.0] floats so the new method has been written to be consistent with that.
It will make its way into a new formal package release once thoroughly tested. For now, feel free to manually use the glowbit.py from the repo.
3 Likes
Thanks @Brenton - works great (both with float and integer values) ![]()
My test script - updated library file named glowbit2.py so I dont mix things up too much
import glowbit2                           # Glowbit stick with new brightness command
from PiicoDev_Unified import sleep_ms     # Cross-platform compatible sleep function

stick = glowbit2.stick()   # default pin=18, sm=0

#########################################
#
# range() function that works for floats
# https://www.techbeamers.com/python-float-range/
#
#########################################
def frange(start, stop=None, step=None):
    # if set start=0.0 and step = 1.0 if not specified
    start = float(start)
    if stop == None:
        stop = start + 0.0
        start = 0.0
    if step == None:
        step = 1.0
#    print("start = ", start, "stop = ", stop, "step = ", step)
    count = 0
    while True:
        temp = float(start + count * step)
        if step > 0 and temp >= stop:
            break
        elif step < 0 and temp <= stop:
            break
        yield temp
        count += 1

#########################################
#
# updateBrightness tests
#
#########################################
print("updateBrightness using float")
print("float","int equiv from glowbit defn",sep="\t")
for f in frange(0.0, 1.01, 0.01):
    print(f, (int(f*255)), sep="\t")
    stick.updateBrightness(f)
    stick.pixelsFill(stick.red())
    stick.pixelsShow()
    sleep_ms(1000)

stick.pixelsFill(0)
stick.pixelsShow()

print("updateBrightness using int")
for i in range(0, 256):
    print(i)
    stick.updateBrightness(i)
    stick.pixelsFill(stick.green())
    stick.pixelsShow()
    sleep_ms(1000)

stick.pixelsFill(0)
stick.pixelsShow()
Hi @Brenton
I have a suggested small change in the Stick rainbowDemo function
Original code (line 1232 … in Github)
    ## @brief Uses the colourMapRainbow() colour map to display a colourful animation
    def rainbowDemo(self, iters = 5):
        while iters > 0:
            for offset in range(33):
                for i in range(8):
                    self.pixelSet(i, self.colourMapRainbow(i,offset, offset+32))
                self.pixelsShow()
            iters -= 1
My change causes the rainbow to use all the LEDs in concatenated Sticks
    ## @brief Uses the colourMapRainbow() colour map to display a colourful animation
    def rainbowDemo(self, iters = 5):
        while iters > 0:
            for offset in range(33):
#                for i in range(8):         ## mjt 20220627
                for i in range(self.numLEDs):
                    self.pixelSet(i, self.colourMapRainbow(i,offset, offset+32))
                self.pixelsShow()
            iters -= 1
1 Like
I’m programming the GlowBit Matrix 8x8 using rPi’s Thonny editor.
Thankfully in the tutorial it explains that you need to be using Thonny as a “super user” in order to get the GlowBit library to compile (ie “sudo thonny”). This works fine with a direct connection into the rPi.
However, when I set up a standard SSH connection from my laptop to the rPi using PuTTY and VNC Viewer it will not allow me to start Thonny as a super user. It only allows me to use Thonny as a standard user. As such the GlowBit library cannot be used in a program through VNC Viewer. This makes it much harder to use in a classroom situation.
So my questions are:
- If it isn’t too technical, why does the Glowbit library need Thonny to be accessed in sudo mode?
- Is there a setting in VNC that would allow me to run Thonny in sudo mode?
- Depending on the answer to question 1, could it be possible to run parts of the GlowBit library without being a super user. ie perhaps a less feature rich version of GlowBit library?
- Are there any other considerations I’m not aware of?
2 Likes
Hey @James94023, thanks for bringing this one to the forums.
Answers to your questions:
- If i recall correctly, Python must have sudo permissions in order to drive the hardware pins, which drive the LEDs.
- Are you attempting to run thonny from a terminal on the Pi? That is, did you connect via vnc, and then execute
sudo thonny? What do you see when you try this? - I don’t think so - since Python would not be able to drive the hardware pins.
2 Likes
This is great! If you’d like your contribution to count to the project consider opening a Pull Request on the repo.
3 Likes
@James94023 I’m not sure I fully understand what’s going on here:
Running thonny with sudo should be no different from within a VNC Viewer session - here I’ve attached some screenshots of my workflow.
You can see that I’m running VNC Viewer - the VNC window is against my purple background.
I open a terminal, execute sudo thonny and then I can run my demo.py script which is sourced from the tutorial.
Are you doing the same workflow with different results?
I wouldn’t expect the experience to be any different if you were logging in via SSH…
A couple of other questions to consider:
- What user are you logging in with?
- Does the user have
sudopermissions?


5 Likes
This is great! If you’d like your contribution to count to the project consider opening a Pull Request on the repo.
I got a couple of these panels.
I designed a 3D case, used a beetle esp32 and set it up with WLED.


4 Likes
Hi Aaron,
That’s ethereal ![]() I’d be curious to see how it looks behind some defusion acrylic: Black LED Diffusion Acrylic Panel 12 x 12 - 0.1 / 2.6mm thick | Adafruit ADA4594 | Core Electronics Australia
I’d be curious to see how it looks behind some defusion acrylic: Black LED Diffusion Acrylic Panel 12 x 12 - 0.1 / 2.6mm thick | Adafruit ADA4594 | Core Electronics Australia
What program did you have running in the video, that looks siiiick
1 Like