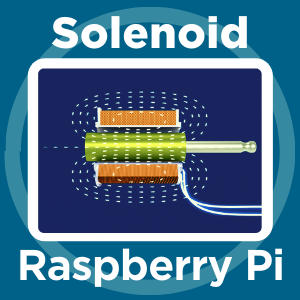
This is a guide on how how to control a 12 Volt Solenoid with a Raspberry Pi which operates at 5V) using a 5 Volt Relay. Solenoids are an immensely useful way to turn electrical energy into a linear motion. Solenoids come in a variety of different specifications with 5 Volt and 12 Volt being very common types used by makers.
Dear Tim,
Thank you very much on the tutorial on controlling a soleoid.
I have saved the page as a pdf file.
However,
I tried to download the associated code at the bottom of the page with associated hyperlink at https://core-electronics.com.au/media/kbase/471/Solenoid_Control3.py . I keep getting “internal server error” whether I download as “save link as” or place the hyperlink in another tab of my browser.
Tim,
Neat tutorial. Just a couple of things I noticed though.
I wondered why you were connecting 3 wires to a relay and there was no protection diode. So I discovered the module you used has a transistor (and the diode) on it as well as red and green LEDs, which is quite handy to prototype stuff.
I was confused by your code description and the reference to BCM when you connect to physical pin 12. I suggest you add a reference or two, but for simplicity the user may like to run the ‘pinout’ command on their Pi to see a list of pins and their Broadcom names.
Since the output has to be high for the relay to be off, it would be good practice to set it high straight after the setmode command. Then the relay has a determined state until you want to use it (possibly much later if you add other processing) in your code.
https://pinout.xyz/ is a fantastic pi pinout reference - including pinouts for a lot of HATs. Shows the difference between the physical connector pin number and the GPIO ir BCM numbering
Cheers for your input I’ll go back and clarify the comments on my code. I would like this to be a simple and clear as I possibly can make it so everyone can jump in, know whats going on and have a go. And definitely telling the GPIO pin to go High right after the setmode command is a great adjustment to the code when it is part of a bigger system.
Also big thanks for that Pinout reference Oliver. Super rad resource.
Dear Tim,
Thank you for that. It is now a zip file. It is easier now, because I have saved this tutorial as a pdf file and the zip file with the same name.
Thank you,
Anthony of Sydney
The relay referred to in that article has a DC rating of 30 Volts and 10 Amps. So it will work just fine with a 24v solenoid, provided that the solenoid does not draw more than 10A. Your solenoid should specify the current it requires, but it would be very unlikely to be anything like that high - for instance the Core 36v solenoid requires less than 3A
Hi, in the article you refer to a system that uses a buck converter. Do you have an article/guidance on how I would put the buck converter into a circuit with only one power pack?
Hey mate, one of my recent guides ‘How to Power High Power 3W LEDS’ I use a Buck converter. There will be some hardware differences however it does have a great 101 understanding of both choosing and adjusting the converter for a desired application.
Yep, you’re definately able to do that. The initial statements will be slightly different (refer to the Pico SDK for appropriate use of MicroPython libraries with it), and you can essentially just use the toggle from Pin instead just to make it even shorter:
from machine import Pin
from time import sleep

pin = Pin(2, Pin.OUT)

while (True):
    pin.toggle()
    sleep(1)
(I’ve used pin two arbitrarily as 0 and 1 ‘should’ be reserved for Serial)
The difference is likely that this is a pilot-operated device and the solenoid you were using previously was not. What do you mean by '‘does not work’? If you hear the solenoid click but the valve doesn’t open then that indicates that you don’t have the required pressure in the line to drive the valve piston.

 have fixed the link now.