This is a placeholder topic for “Raspberry Pi 400 - Unit Only” comments.
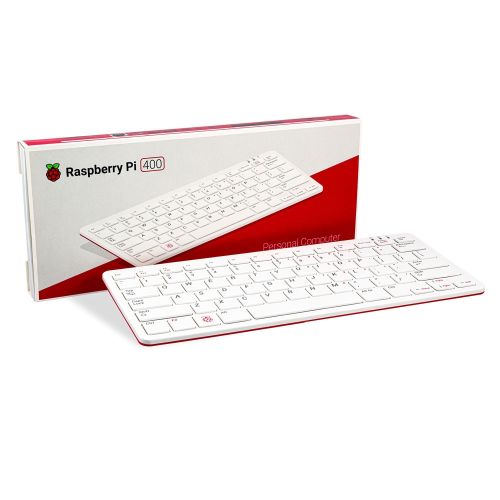
This is the Raspberry Pi 400 without the trim (unit only). You may need some extra bits, check the description.
Read moreThis is a placeholder topic for “Raspberry Pi 400 - Unit Only” comments.
This is the Raspberry Pi 400 without the trim (unit only). You may need some extra bits, check the description.
Read moreHi. Do you sell the rPi 400 withtl the UK layout?
Hi Patrick,
We only stock the keyboard layout most common in Australia. I think the official name is the US-international layout.
Hi. I’d like to use my PI400 for controlling some Christmas decorations.
Can anyone recommend a GPIO breakout for the PI400?
Hi Pix,
I reckon this board would be the way to go: Adafruit CYBERDECK Bonnet for Raspberry Pi 400 | ADA4862 | Core Electronics Australia
Though if you want to make a project out of it I’d check out the Automation2040 what kind of decorations were you looking to control?
My plan was to just write a wrapper around the FastLED Library.
Alternatively I bet Python has an equivalent library.
I think glowbits are WS2812B so I think @Michael 's glowbit repo would probably work too.
Are there any advantages to the Automation2040?
Hi Pix,
Yeah GlowBits are WS2812BV5’s (the same in software) so will work perfectly, no advantages other than it allows for other types of lights to be controlled more easily (thanks to the onboard relay).
On the Automation2040, its more that its a microcontroller (better for running lighter timing dependent tasks like LEDs) rather than a Pi to drive LED’s and use a server on the Pi to control them, here’s a product you can buy bit soldering directly to the Pico works perfect as well: Plasma Stick 2040 W (Pico W Aboard) | Pimoroni PIM653 | Core Electronics Australia
This looks suspiciously like an Apple “Magic” keyboard which I use.
The UK symbols such as Pound, Euro etc are available bu using “option” and “shift option” keys.
The following is a list of printable characters available using those 2 keys. The top block is all the characters available using these 2 keys starting with the numbers and finishing with /.
The bottom block is the characters I most commonly use.
Cheers Bob
I think what your saying here is that the Automation2040 can control lots of different types of LEDs, not just the WS2812B style. Is that right?
Can you give me an example of something that would be easier or superior with a micro-controller than the PI400 I already own?
i.e. will they be brighter? Less flickering? Less likely to glitch due to synchronization issues?
Hi Pix,
Yeah sorry, thats a much more succinct way of putting it.
Mostly personal preference, for a one off project using a Pi is perfect.
Brightness and flickering will all depend on the hardware (and software config) - just make sure you have a beefy supply!
Reasons for microcontroller:
This is super helpful to keep in mind. I was wanting to use the inbuilt audio output of my PI400 and sync it with the LEDs. If running the audio and the LEDs from the PI400 at the same time proves glitchy maybe I will give the responsibility of managing the WS2812Bs to a microprocessor. Then I would just need to write some code that passes “instructions” from the PI to the microprocessor so it knows what to do.
Going back to this bonnet you recommended earlier. I was trying to figure out how it connected. Seeing the picture of the cyberdeck made me pull out my PI400 and I saw the rubber cap. Took that off… Oh Wow! Pins! I had no idea!
Is there anything stopping me from attaching a female to male jumper wire onto one the header pins under that rubber cap?
Hi Pix,
Keen to see how you go! I’ve been meaning to get a project like that done with my light boxes: Back on the LED project :D
With the number of processors on the Pi you should be all good!
Not at all, feel free to connect directly to them, they are the same GPIO that the model B Pi’s have
Hey Pixmusix,
Sounds like you have been hashing out an awesome project, LED lights are a must do project in anyone’s DIY electronics journey. I would love to see how the project turns out once you’ve got it up and running!
Cheers,
Blayden
Hey @Blayden.
Very exciting! I hope the Busy Board I’m making for my kid to be ready by Christmas. ![]()
After a lot of play testing I’ve realized that my scope was too large. Lot’s of buttons was overwhelming for the kids I tested.
I needed fewer components that did more.
For instance, a glowbit rainbow that sometimes sweeps, sometimes pulses, and sometimes flashes is better than three rainbows doing one of each.
I’m very happy with how the c++ code is coming along. I’m now building the actual box for all the buttons, dials, and leds. After that I imagine there will be 3-4 weeks of debugging.
I’ll post some photos when I’m done.
In this thread I spent a long time with Bob on a clock to trigger hardware interrupts.
The biggest lesson I took away from that was that my lack of education and was preventing me from asking good questions and giving relevant information. Things like not being able to draw a diagram of what I was making, or mistaking 1nf for infinity. After I realized I was stuck I bought the Art of Electronics by Horowitz and Hill and spent some time getting the jargon under my belt.
I did get that working in the end; but by the time I did I had also re-evaluated what I really needed and discovered there were better ways.
The point is this has taken, as usual, longer than expected. I knew when I started I was challenging myself but I had not realized that embedded systems was an entire ecosystem and industry separate to my information technology background.
Watch this space. I’ll have something to show for my efforts soon!
Hi @Liam120347.
Just wondering if I’m overthinking my design.
I’ve got these nice battery powered Christmas lights here.
If I just
what would be stopping me from turning them on and off by just throwing that pin High and Low with python code.
Is that what a relay is for? Given that these fairy lights are only 4.5v… Do I even need a relay?

Hey, this thing is pretty cool… The old school form factor is super cute. That 40 pin GPIO hanging out the back only adds to the old school charm.
…Although I can totally see using a wireless keyboard with it making sense in a lot of situations.
Hey Pixmusix,
That looks like an awesome little bundle of fun! I am not sure what amperage that LED string requires, but it may be worth looking into if its more than the Pi400 can supply and if so, you may need to use a relay with that one.
Cheers,
Blayden
Hi Pix,
The PI’s GPIO arent made for handing that kind of output so you’ll definitely damage your pins.
A MOSFET connected to allow the 3.3v or 5V power rails to supply the power would be a much more robust way of driving them: MOSFETs for Makers: Getting Started with High-Power Control - Tutorial Australia
Liam
Super spewing. Last night I had a 400 kit from the official Pi distributer in my cart for $87, and I ummed and ahhed until today like a total goose, only to find somebody had discovered their mistake and doubled the price ![]()
Hey Kimmo,
It definitely can happen! I know there been times we have made the unfortunate mistake ourselves. Everybody has human moments!
Cheers,
Blayden
And you can get our latest projects and tips straight away by following us on:
![]()
![]()
![]()
![]()
